LATENCY
Requirements for making music in rhythmic sync
In order to play music with other people, especially in styles where rhythmic synchrony is important, it’s essential that the players hear each other as quickly as possible. Even when playing together in the same room, there’s some amount of latency, because sound travels through air at about 1 foot per millisecond, meaning it takes about one thousandth of a second to travel one foot.
So, if a drummer is 10 ft (3 m) away from a bassist in a room, there’s a one-way latency of 10 ms between them, assuming they’re playing acoustically. It’s been established that musicians start to notice latency when it exceeds 20 ms one-way, equivalent to playing 20 ft (6 m) apart in a room. Depending on the style of music played, however, latencies up to 45 ms or more can be acceptable.
Sources of latency
When playing music over the internet, latency is caused by three factors:

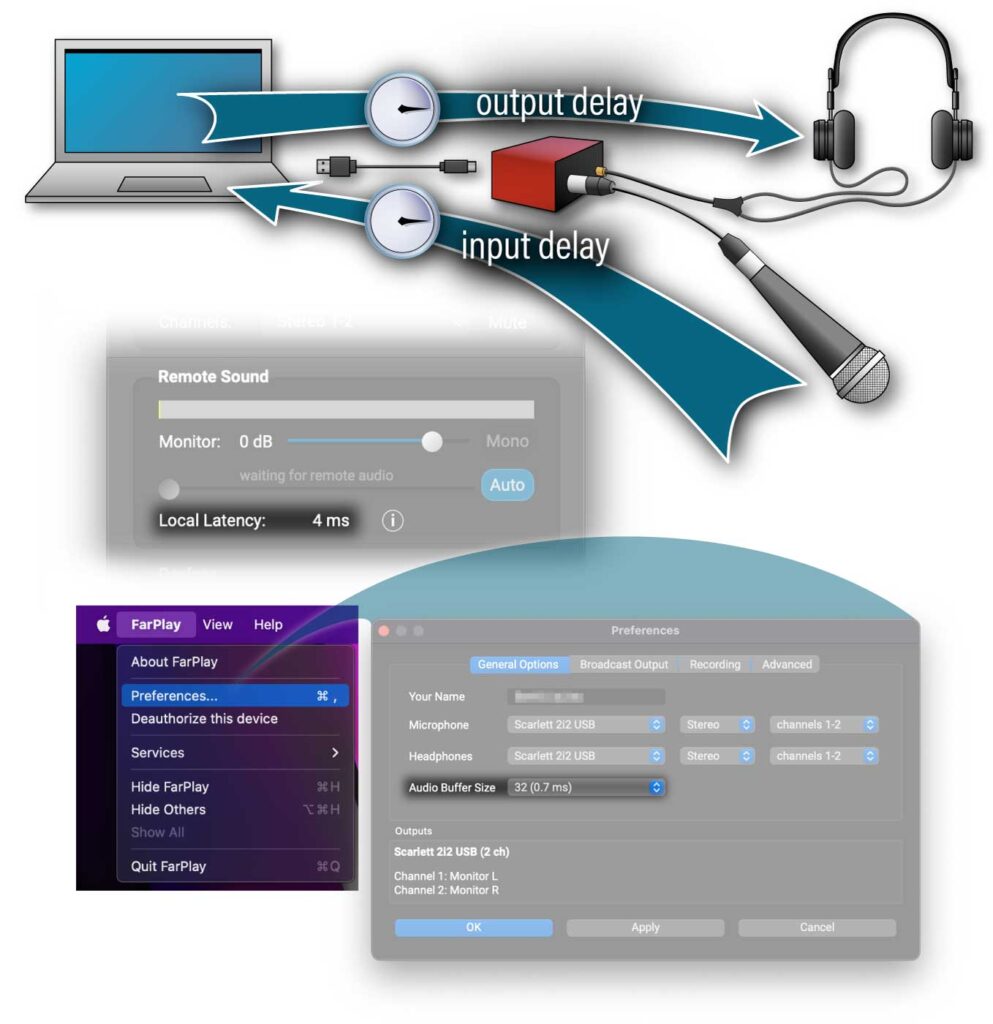
1. Your local latency, which is an estimate of the amount of time it takes for audio to get from your microphone through your computer to your headphones. FarPlay displays this number (“Local Latency”) when you’ve started a session but not yet connected to anyone else. This can be minimized by adjusting your Audio Buffer Size in FarPlay Preferences. Depending on your setup, this can be as low as 2 ms.
If you’re on Windows, make sure to use an ASIO driver for your sound card provided by your sound card manufacturer.
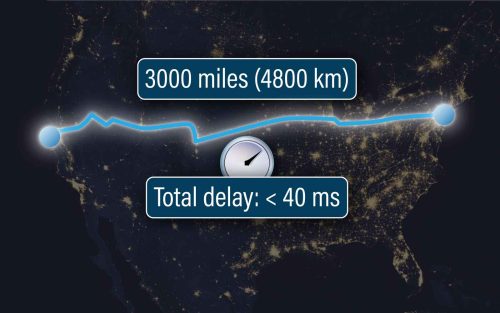
2. Physical distance. Information can’t travel faster than the speed of light, physics tells us, so the farther you are away from the person or people you’re playing with, the longer it will take for audio data to travel between you. Under good network conditions, FarPlay can produce latencies below 40 ms even with 3000 miles (~4800 km) of distance between participants, and well below 20 ms within 1000 miles (1600 km).
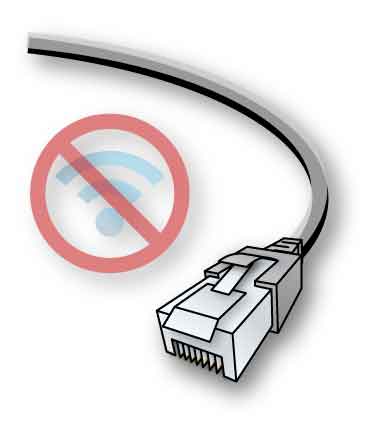
3. Internet and home network conditions, which can vary greatly, both in terms of bandwidth (your upload and download speeds) and of jitter (how much variance there is in the time it takes data to get from one place to another). You can improve your internet connection in a couple of ways. First of all, make sure to connect your computer directly to your router using Ethernet, rather than using Wi-Fi. Newer wireless standards like Wi-Fi 6/6E can provide lower latency than older wireless standards, but if you don’t already have a properly configured Wi-Fi 6/6E or newer wireless home network, it’s likely easier and more effective to use Ethernet. Second, the faster and more reliable your upload speed, the better. Fiber internet gives the best performance. If you are stuck with cable internet, using a business cable plan will give substantially better performance than a residential cable plan. 50 Mbps or greater of upload speed is best for FarPlay.
Latency slider and latency-vs.-clarity trade-off
Why does FarPlay’s latency slider make us choose between lower latency and cleaner sound? Why can’t we have sound that is completely free of both latency and static at the same time?
End-to-end audio delivery time varies
Audio is transmitted through the Internet in “packets.” Each packet delivers a very short portion of sound. The home-to-home delivery time can vary from packet to packet. If we played each packet immediately upon arrival, packets would be played at irregular intervals of time, often creating gaps in playback heard as audible static or crackles. To solve this problem, we temporarily store arriving packets in a jitter buffer. To simplify explanations on this page, we visualize a jitter buffer as a conveyor belt—this represents a portion of computer memory of fixed size. (FarPlay actually uses a more sophisticated jitter buffer that provides sample-accurate latency management and handles even large bursts of arriving packets without being “overrun”).Dragging the latency slider toward the right
Dragging FarPlay’s latency slider toward the right makes FarPlay use a larger jitter buffer, which means there is a longer delay between the arrival and then playback of the first packet received. A larger jitter buffer makes latency higher. Occasionally, a transmission backlog somewhere along the route delays a cluster of packets “until the dam bursts” and the current and late packets arrive almost all at once in a barrage. In the example below, the late packets in the larger barrage and the late packet in the smaller barrage all have enough time to “hurry to their places” to be played because the jitter buffer is so big. None of these late packets is skipped. A large jitter buffer makes static rare.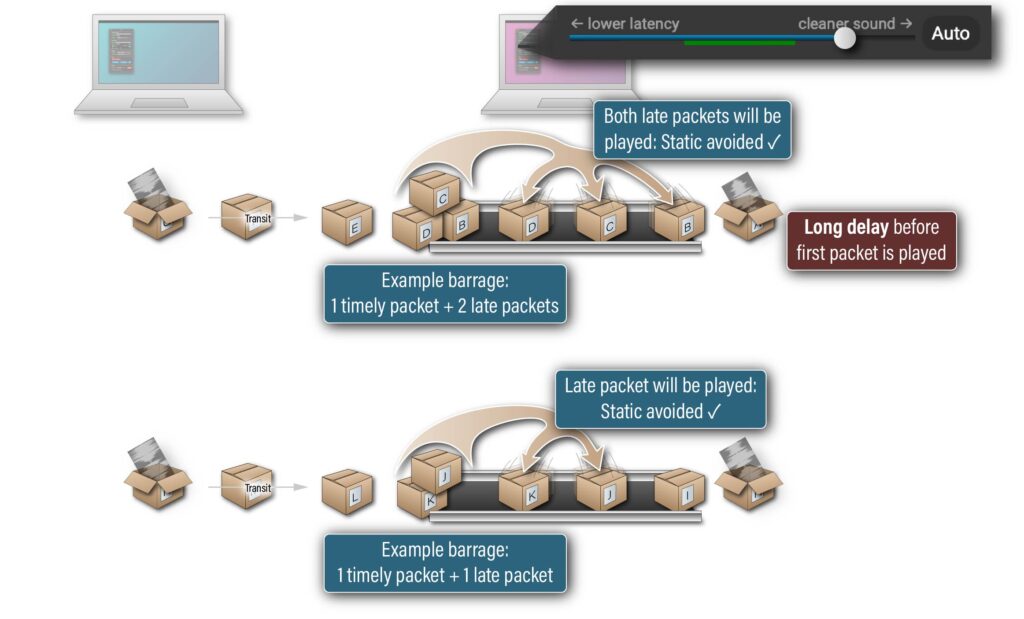
Dragging the latency slider toward the left
Dragging FarPlay’s latency slider toward the left makes FarPlay use a smaller jitter buffer. There is very little delay between the arrival and then playback of the first packet received. A smaller jitter buffer makes latency lower. Unfortunately, prompt playback of the first packet received denies the late packets from the larger barrage and the late packet from the smaller barrage the chance “to hurry to their places” for seamless playback at their appropriate times. A smaller jitter buffer makes gaps in playback, heard as static, more frequent.
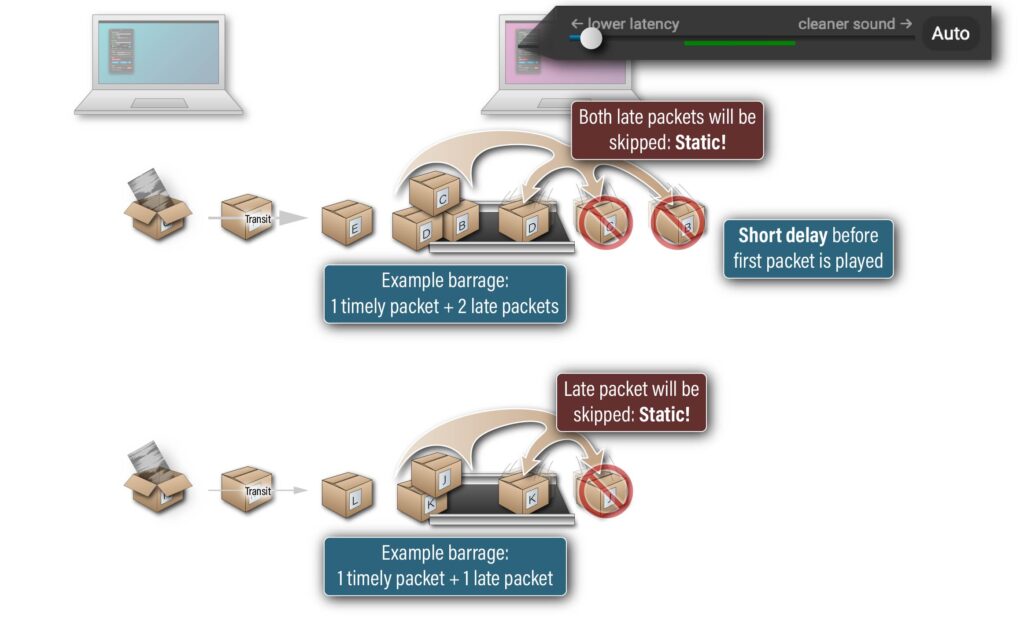
Using recommended latency slider positions
Dragging the slider to an intermediate position chooses a medium jitter buffer size. The first packet received waits a medium amount of time before playback. A jitter buffer of medium size provides medium latency. One of the late packets from the larger barrage is skipped, creating static. However, another late packet from the larger barrage and the late packet from the smaller barrage are both played. The smaller barrage doesn’t result in static. A medium jitter buffer size results in a medium amount of static. FarPlay uses the green bar under the latency slider to indicate a recommended range of slider positions, each of which should provide a reasonable compromise between latency and static.
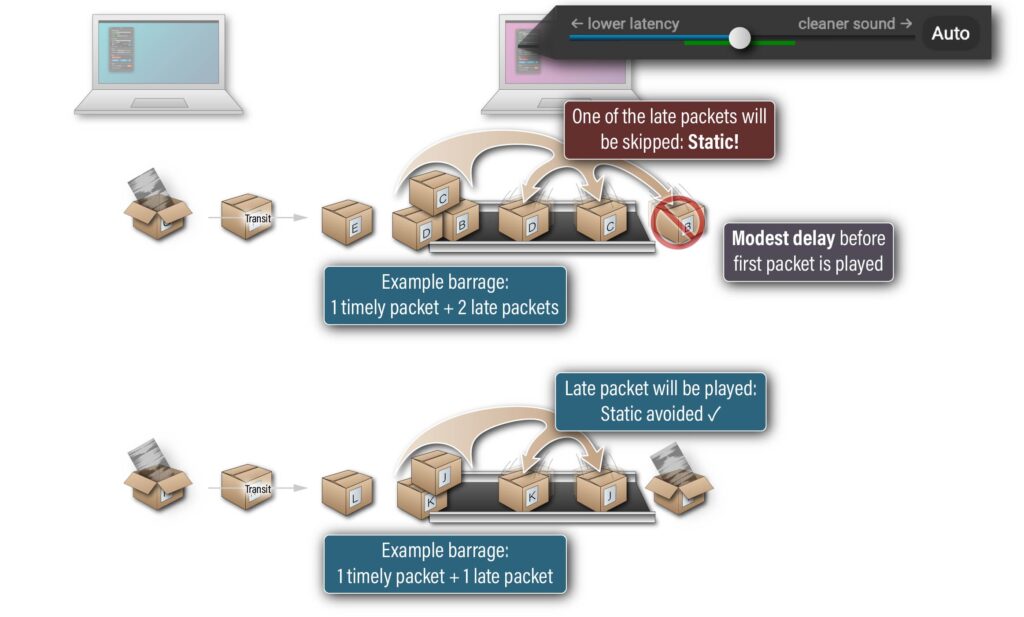
Automatic and manual management of buffering latency
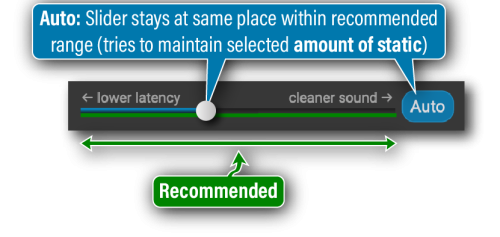
By default, FarPlay starts in Auto latency mode. Select your preferred balance of latency vs. clarity, and FarPlay automatically adjusts the buffering latency to try to keep the amount of static relatively constant (at the cost of occasional bursts in latency). The green bar indicates slider positions that give recommended combinations of latency and static. Auto latency mode zooms in to the green bar to make sure every slider position you can choose is a recommended position.
Switching to manual latency mode (Auto button off) makes the green bar shrink, revealing ranges of slider positions outside the recommended range. You can use such slider positions to get especially low latency or super robustly clean audio. In manual latency mode, you set the size of the jitter buffer directly. FarPlay then keeps using the jitter buffer size you selected, even if network conditions deteriorate, degrading audio quality. When this happens, you’ll see the green bar temporarily drift toward the right. Significant and frequent drifting of the green bar means that your network connection is unstable. Using manual latency mode provides relatively consistent latency at the cost of occasional bursts in static.
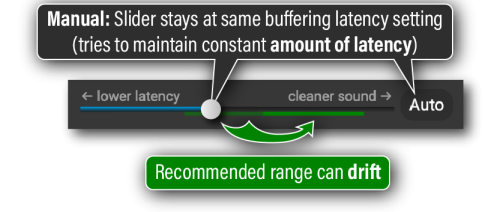
We recommend using Auto latency mode in most cases and only switching to manual mode when you need precise latency control and/or stability or in specific difficult cases (for example, when frequent changes in network conditions cause Auto latency mode to change latency with annoying severity and frequency). Please note that even manual latency mode cannot guarantee 100% stable end-to-end latency because not only jitter, but also the minimum network journey duration, may still vary.
Latency slider behavior with 0, 1, or 2+ remote users
0 remote users: The latency slider is disabled when you don’t receive audio from the remote end.
1 remote user: The latency slider behaves as described above.
2+ remote users: In multi-user sessions, dragging the main latency slider (left column, under “Remote Sound“) drags all the latency sliders (including all the sliders for remote individuals, shown in the right column). You can use individual latency sliders in the right panel to adjust latency for each connection separately.

Latency indicator
The Latency Indicator below the latency slider displays the estimated full end-to-end latency between the remote end and you. Even though we try to make this estimate as accurate as possible, there are cases in which it won’t be exact. For example, it’s impossible to reliably account in all cases for the full latency added by operating system drivers or external audio interfaces.

Click the estimated latency to change units (you can select among milliseconds (ms), feet (ft), and meters (m)).

In this example, the remote latency is 23 ft, which means sound is taking about the same amount of time to get from the remote musician to you as it would take to get from them to you through air if you and they were 23 feet apart in a room. This distance is called the acoustical distance between the remote musician and you.

Because sound travels about 1 ft in 1 ms, the number of milliseconds of remote latency (21 ms here) and the number of feet of remote latency (23 ft here) are about the same.
As mentioned above, when there is no other participant in the session, the Latency Indicator shows your Local Latency. The local latency does not include any network component. It’s the estimated end-to-end latency between your microphone and your headphones (e.g. when monitoring your own sound). This is a good (although still not 100% accurate) estimate of the latency created by your audio drivers. It is a good idea to check your local latency before you connect to anyone else. You might need to configure your Audio Buffer Size in FarPlay Preferences to improve your local latency.

Buffering that works with a wide range of connection types
FarPlay works great over a wide range of connection types and purposes, including making music with ultra-low latency over Ethernet and chatting with still quite low latency over Wi-Fi.

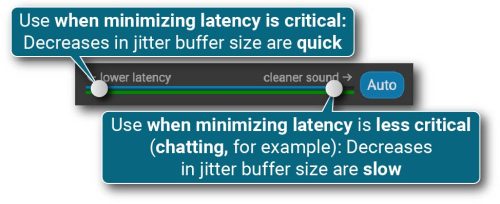
To understand how this flexibility is possible, it’s helpful to recognize that the adjustments to buffering latency that FarPlay makes in Auto latency mode happen over time, in response to changing network conditions: increases in the severity of packet backlogs result in increases in the size of the jitter buffer, and decreases in the severity of backlogs result in decreases in the size of the jitter buffer.

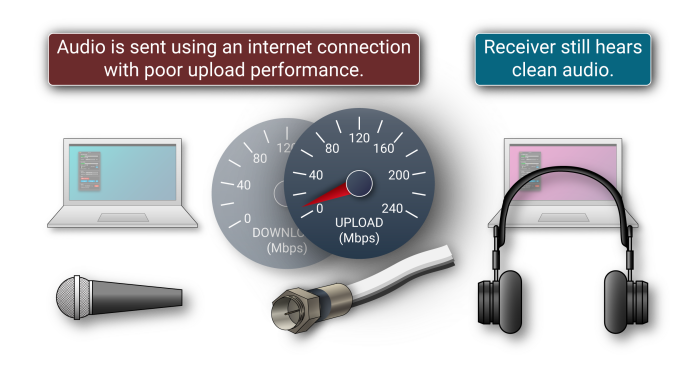
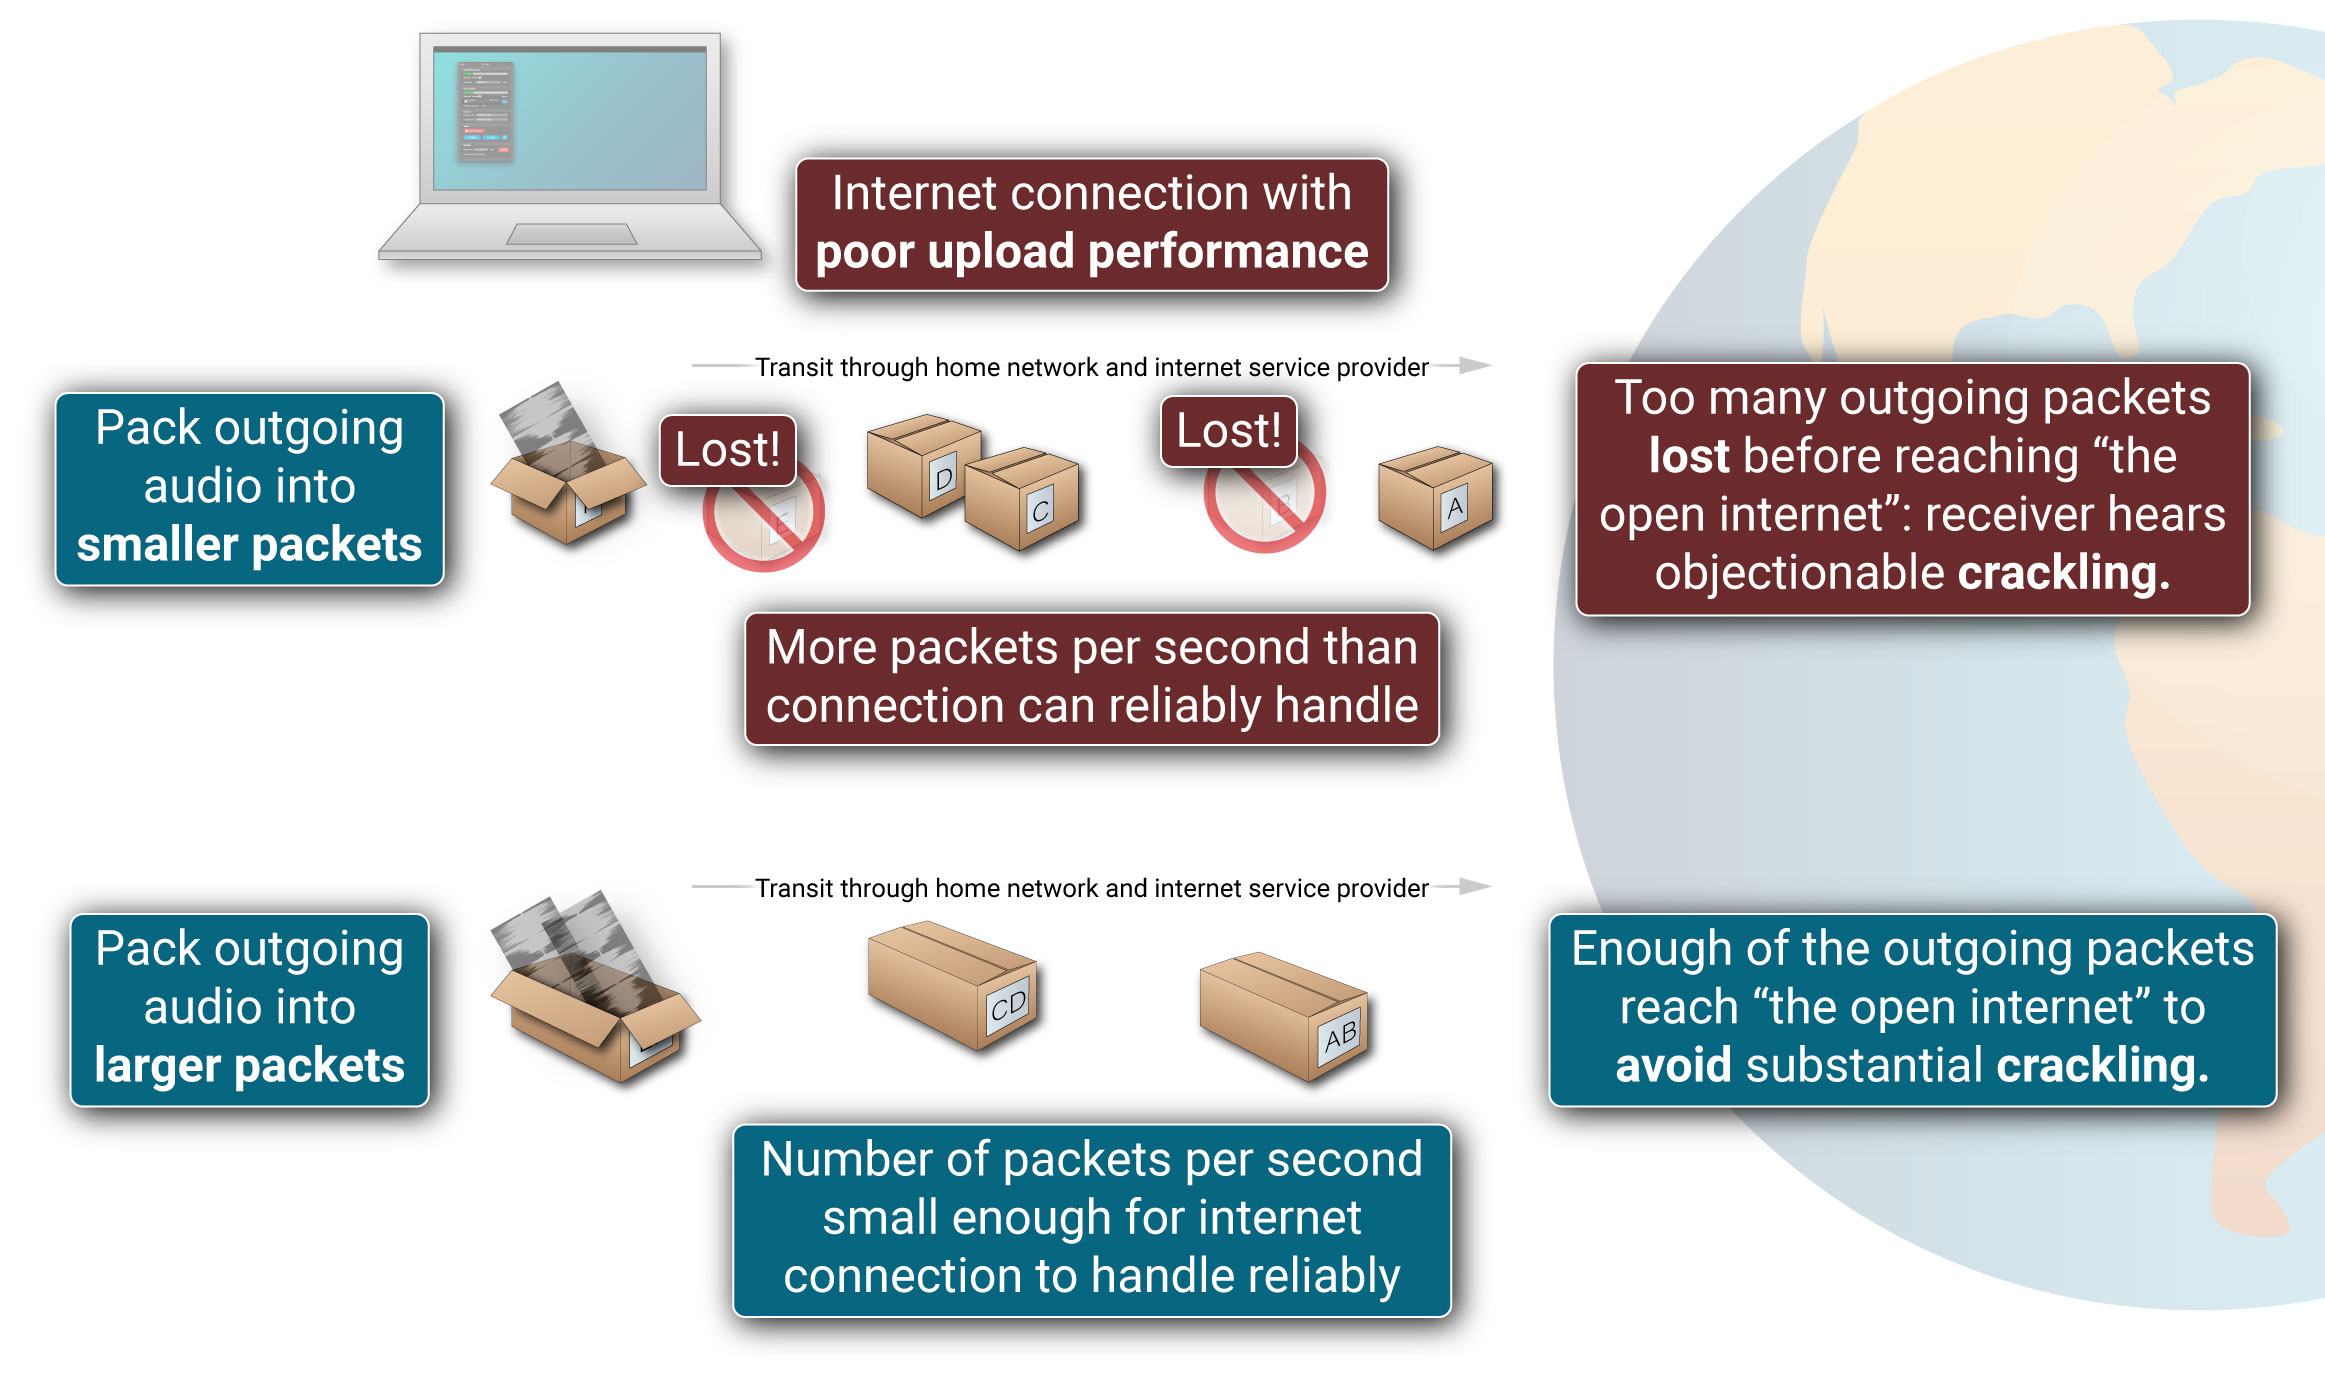
To solve this problem, audio should be packaged in bigger packets that are sent less often. On the other hand, we don’t want the packet size to become too big because it takes a lot of time, potentially increasing latency, to completely pack big packets with audio data.
What we really want is for the packet size to be adjusted to be small enough to avoid adding latency, but no smaller. With version 1.2.1, FarPlay handles such adjustments automatically.