ACCESSIBILITY
ACCESSIBILITY
Jump to:
Choose Your Computer
Screen reader
Use FarPlay with your Mac’s built-in VoiceOver screen reader.
In VoiceOver Utility, go to the Navigation page. Make sure Synchronize keyboard focus and VoiceOver cursor is unchecked. Make sure Mouse pointer: is set to Moves VoiceOver cursor.
Keyboard navigation
Use arrow keys to navigate labels and clickable items, like buttons. To navigate clickable items and skip most labels in FarPlay windows, press the tab key.
Hold the Option key while using left- and right-arrow keys to drag sliders.
To go to the menu bar, press Control-Option-M, where Control-Option is the example of the VoiceOver modifier we use on this page. You might have chosen a different key combination for your VoiceOver modifier in VoiceOver settings. Navigate among menus in the menu bar by pressing Control-Option-Left Arrow and Control-Option-Right Arrow. To open a menu from the menu bar, press Control-Option-Space. Then, press Control-Option-Up Arrow and Control-Option-Down Arrow to navigate among items in the menu you’ve just opened and Control-Option-Right Arrow to go into a sub menu. To click a menu item, press Control-Option-Space.
When searching for a feature, explore the menu bar first. Most features that can be accessed through buttons and their context menus can also be accessed through the menu bar, which is easier. When available, keyboard shortcuts are announced in menu-item descriptions. Keyboard shortcuts are also listed in the tables below.
General shortcuts
The following commands are available to all users, including users of free mode without an account.| Command | Keyboard shortcut | Notes |
|---|---|---|
| Start a One-Time Session | Command-N | |
| Join a Session… | Command-J | |
| Rejoin Last Session | Option-Command-J | Available if last session is still available |
| Copy Invitation Link | Command-Option-I | |
| Copy Session ID | Shift-Option-Command-I | |
| Mute/unmute yourself | Option-Command-M | |
| Leave Session | Option-Command-L | |
| Show Main Window | Command-1 | |
| Show Video | Command-2 | Available during a session |
| Show Mixer | Command-3 | Available when mixer is active |
| Show Chat | Command-4 | |
| Show Video Post-Processing Window | Command-5 | |
| Close Window | Command-W | Available for Video, Mixer, Chat, and Video Post-Processing windows |
| Close Dialog | Escape | Available for Preferences, Waiting Room, and Broadcast Output dialogs |
| Share desktop screen | Shift-Command-S | Available when video is open |
| Stop screen sharing | Shift-Command-X | Available when video is open |
| Video Preferences | Shift-Command-V | Available when video is open |
| Preferences | Command-Comma | |
| Quit FarPlay | Command-Q |
Shortcuts for recording
Recording requires a subscription or a session created by a FarPlay For Teachers subscriber. Learn more about recording here.| Command | Keyboard shortcut |
|---|---|
| Record Video & Audio | Option-Command-R |
| Stop Recording | Option-Command-S |
Shortcuts for using Persistent Rooms and Waiting Rooms
If you have a Persistent Room, you can use the shortcuts below to manage it and its Waiting Room. To get a Persistent Room, subscribe.| Command | Keyboard shortcut | Notes |
|---|---|---|
| Enter your Persistent Room | Command-E | Goes to your first Persistent Room, if you have more than one. |
| Open Waiting Room | Option-Command-W | Available when Waiting Room has at least one participant |
| Lock Session | Option-Command-K | Available when Waiting Room is unlocked |
| Unlock Session | Option-Command-U | Available when Waiting Room is locked |
Advanced shortcuts
Broadcast Output requires a Standard+ or FarPlay For Teachers subscription. Learn more here.| Command | Keyboard shortcut |
|---|---|
| Broadcast Output… | Option-Command-B |
Menus for selecting the audio device to use for microphone input are examples of menus that aren’t found in the menus in the menu bar. To use this kind of menu in FarPlay for macOS 11 Big Sur or higher, use the steps below.
- Make sure you’ve landed on the menu by tabbing. If you found the menu using arrow keys, press tab until you land on the menu again.
- Press Control-Option-A. Listen for VoiceOver to announce the number of menu items and also each item in the menu. Use the up and down arrows to navigate the menu to listen to VoiceOver announce individual items again, if you’d like. You can use the up and down arrow keys as soon as VoiceOver has started announcing the first menu item.
- Determine where in the menu a desired item is located. For example, if you’re choosing an audio device for microphone input, VoiceOver might have announced the following.
- “menu, 5 items”
- “No Audio”
- menu-item sound effect, “horizontal splitter, no action available collapsed on top”
- menu-item sound effect, “Input Mixer“
- menu-item sound effect, “horizontal splitter, no action available collapsed on top“
- menu-item sound effect, “System Default”
- menu-item sound effect, “External Microphone”
- menu-item sound effect, “MacBook Pro Microphone”
- To choose the fourth menu item, hold the Option key, press the down-arrow key four times, release the Option key, and, finally, press Space.
In FarPlay for macOS Catalina or lower, VoiceOver doesn’t read the menu items in the example above, but the instructions for choosing the fourth menu item using the Option key, the down-arrow key, and Space still work.
Use arrow keys to navigate the menu bar. To navigate clickable items in FarPlay windows, press the tab key.
Go to the menu bar in the current window by pressing Alt. Most FarPlay windows have menu bars.
When searching for a feature, explore the menu bars first. Most features that can be accessed through buttons and their context menus can also be accessed through a menu bar, which is easier. When available, keyboard shortcuts are announced in menu-item descriptions. Keyboard shortcuts are also listed in the tables below.
General shortcuts
The following commands are available to all users, including users of free mode without an account.| Command | Keyboard shortcut | Notes |
|---|---|---|
| Start a One-Time Session | Control+N | |
| Join a Session… | Control+J | |
| Rejoin Last Session | Control+Alt+J | Available if last session is still available |
| Copy Invitation Link | Control+Alt+I | |
| Copy Session ID | Control+Alt+Shift+I | |
| Mute/unmute yourself | Control+Alt+M | |
| Leave Session | Control+Alt+L | |
| Show Main Window | Control+1 | |
| Show Video | Control+2 | Available during a session |
| Show Mixer | Control+3 | Available when mixer is active |
| Show Chat | Control+4 | |
| Show Video Post-Processing Window | Control+5 | |
| Close Window | Control+W | Available for Video, Mixer, Chat, and Video Post-Processing windows |
| Close Dialog | Escape | Available for Preferences, Waiting Room, and Broadcast Output dialogs |
| Share desktop screen | Control+Shift+S | Available when video is open |
| Stop screen sharing | Control+Shift+X | Available when video is open |
| Video Preferences | Control+Shift+V | Available from the video window, when open |
| Preferences | Alt+P | |
| Quit FarPlay | Control+Q |
Shortcuts for recording
Recording requires a subscription or a session created by a FarPlay For Teachers subscriber. Learn more about recording here.| Command | Keyboard shortcut |
|---|---|
| Record Video & Audio | Control+Alt+R |
| Stop Recording | Control+Alt+S |
Shortcuts for using Persistent Rooms and Waiting Rooms
If you have a Persistent Room, you can use the shortcuts below to manage it and its Waiting Room. To get a Persistent Room, subscribe.| Command | Keyboard shortcut | Notes |
|---|---|---|
| Enter your Persistent Room | Control+E | Goes to your first Persistent Room, if you have more than one. |
| Open Waiting Room | Control+Alt+W | Available when Waiting Room has at least one participant |
| Lock Session | Control+Alt+K | Available when Waiting Room is unlocked |
| Unlock Session | Control+Alt+U | Available when Waiting Room is locked |
Advanced shortcuts
Broadcast Output requires a Standard+ or FarPlay For Teachers subscription. Learn more here.| Command | Keyboard shortcut |
|---|---|
| Broadcast Output… | Control+Alt+B |
Menus for selecting the audio device to use for microphone input are examples of menus that aren’t found in the menus in the menu bar. After you land on this kind of menu, you’ll hear NVDA announce “ComboBox“. Press Space to go into the menu. Then use up- and down-arrow keys to navigate among the listed options, which are read aloud as you navigate. Press Enter to select an option.
Customize audible notifications
Starting with version 1.3.1, FarPlay can play audible notifications when someone joins or leaves the session.
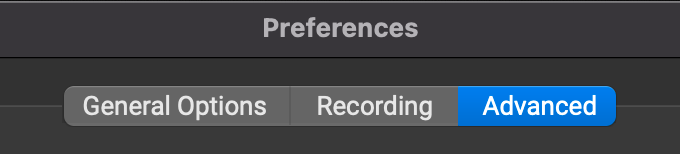
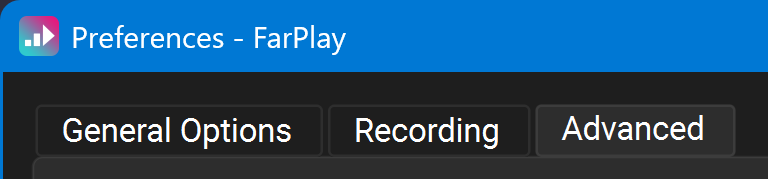
- Open FarPlay Preferences. Go to the Advanced tab.

- Keep Audio notifications checked if you’d like FarPlay to play a chime when someone joins a session and an egg shaker when someone leaves a session.
- Use the slider to the right of the audio-notification option to adjust the volume of these notifications. If your screen reader doesn’t announce the slider’s position as you adjust it, navigate away from and back on to the slider to hear its current level.
- Press OK.


Limitations
We’re aware that chat is currently inaccessible to keyboard navigation and will work to improve accessibility for chat as soon as we can.
We’re aware that some of the information in the video post-processing window is currently inaccessible to VoiceOver. To post-process video recordings, use the following steps.
- Navigate the table of recordings using the tab key, rather than arrow keys.
- When you’ve tabbed to the name of a recording you want to post-process, press the tab key an additional five times and then press Space to open a dialog box containing a “Process” button you can select to begin post-processing. A dialog box announces when processing is complete.
- If you’ve tabbed to the name of a recording that was previously processed, you can press the tab key six times and press Space to open the location of the output files in Finder.
- Alternatively, if you’ve tabbed to the name of a recording that was previously processed, you can press the tab key seven times and press Space to remove the temporary files.
Even though holding Option and using the left- and right-arrow keys adjusts a pan knob, the amount of pan is not announced.
If you tab to the “Join Session” button and press Control-Option-A, VoiceOver doesn’t read the menu item called “Rejoin a room” that immediately follows “horizontal splitter, no action available collapsed on top”. When using VoiceOver, we recommend, instead, accessing the functionality of the “Join Session” button through the Session menu in the menu bar.
We’re aware that chat is currently inaccessible to keyboard navigation and will work to improve accessibility in chat as soon as we can.
Some of the items in the post-processing window are not announced. You might hear NVDA reader announce “unknown” for a table entry. When you want to post-process a video recording, make sure to leave all FarPlay sessions. In the post-processing window, hit the “Process” button for the recording you want to export. Then, wait until a dialog box announces that post-processing is complete. This might take a while, depending on the length of your recording.