WINDOWS
Getting low latency audio to work on Windows sometimes takes a bit more work than on Mac, but it’s possible! FarPlay works with Windows audio devices and with ASIO devices. Using an audio interface with manufacturer-provided ASIO drivers is the gold standard for getting low latency audio to work on Windows, but you can also experiment with using ASIO4ALL using our instructions below, if you like.
Just as when using Mac, if you’re using a laptop, keep your laptop plugged into wall power when using FarPlay, and set your computer to use High Performance Mode (this is a Power Management setting).
Windows audio
As of version 0.3.7, FarPlay supports use of Windows audio devices, so you can get started out of the box without installing ASIO4ALL and without buying an audio interface with ASIO drivers. To use Windows audio devices, just follow our QuickStart instructions, which include the following steps for using the Windows Sound Control Panel.- If the volume of your voice is too low (hardly any green when you speak) or too high (lots of red when you speak/sing), or if you sound garbly, robotic, or distant, click Start > Settings > System > Sound.
- Click More Sound Settings (Windows 11) or Sound Control Panel (Windows 10).
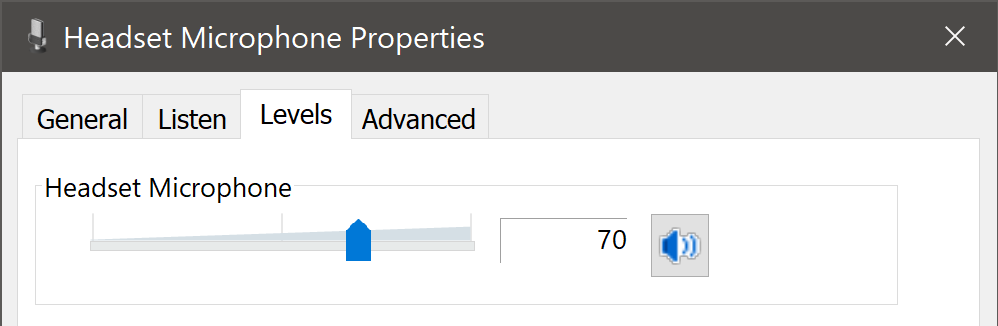
- In the Recording tab of the Sound Control Panel, double-click on your microphone (example: Headset Microphone).

- If your mic has no external gain knob, click on the Levels tab and adjust the mic level slider to adjust your mic volume. In the level meter under You (…) in FarPlay, you want to see green when speaking, and you want to avoid seeing red when singing/playing. Click Apply in the Windows mic settings panel.
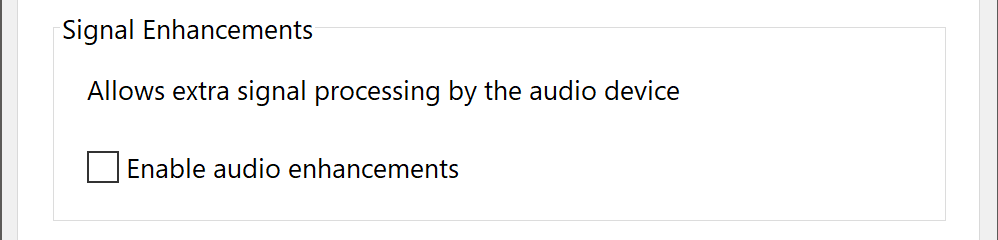
- To fix distorted, garbly audio, click Advanced.
- Look for a Signal Enhancements section and make sure the checkbox for Enable audio enhancements (or Enable sound effects) is unchecked. Click OK.


ASIO4ALL Quick Start
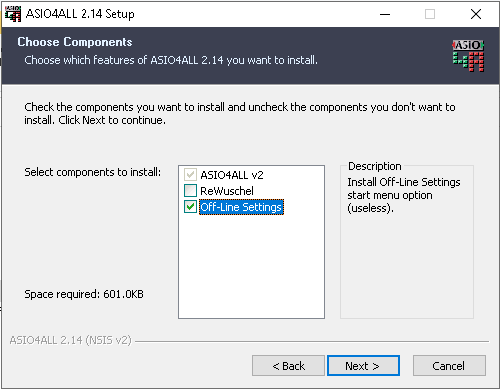
You can try to get lower latency by using ASIO drivers. Using ASIO4ALL lets you use your existing hardware. Using an audio interface with reliable ASIO drivers provided by the manufacturer is the gold standard for getting rhythmically playable latency on Windows.- Download and install ASIO4ALL version 2.14. We recommend this older version because newer versions dropped support for “Off-line Settings,” making it significantly more difficult to configure ASIO4ALL.
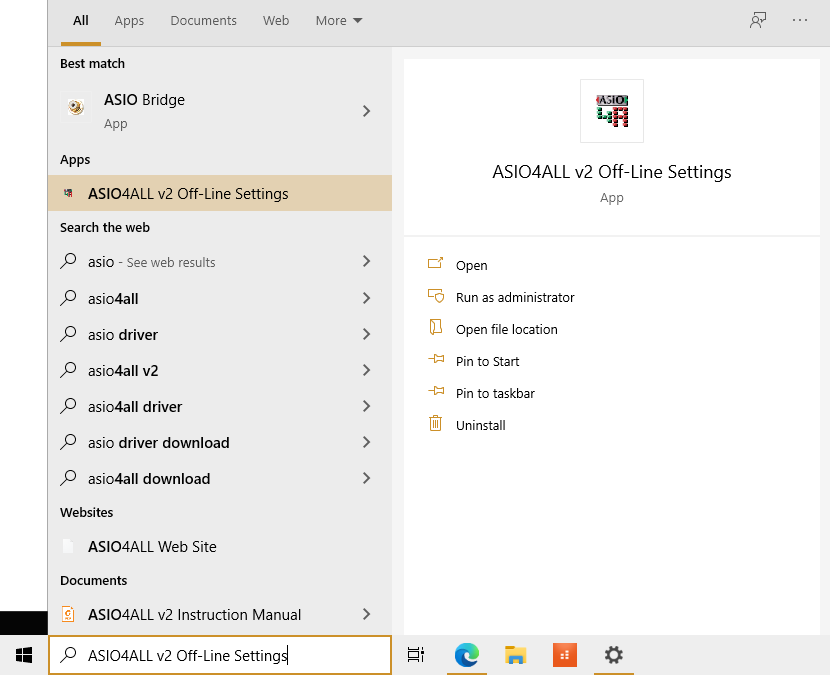
- During installation, be sure to check the box for Off-Line Settings:
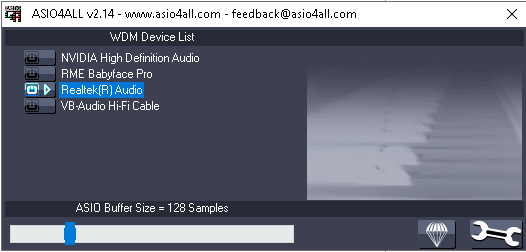
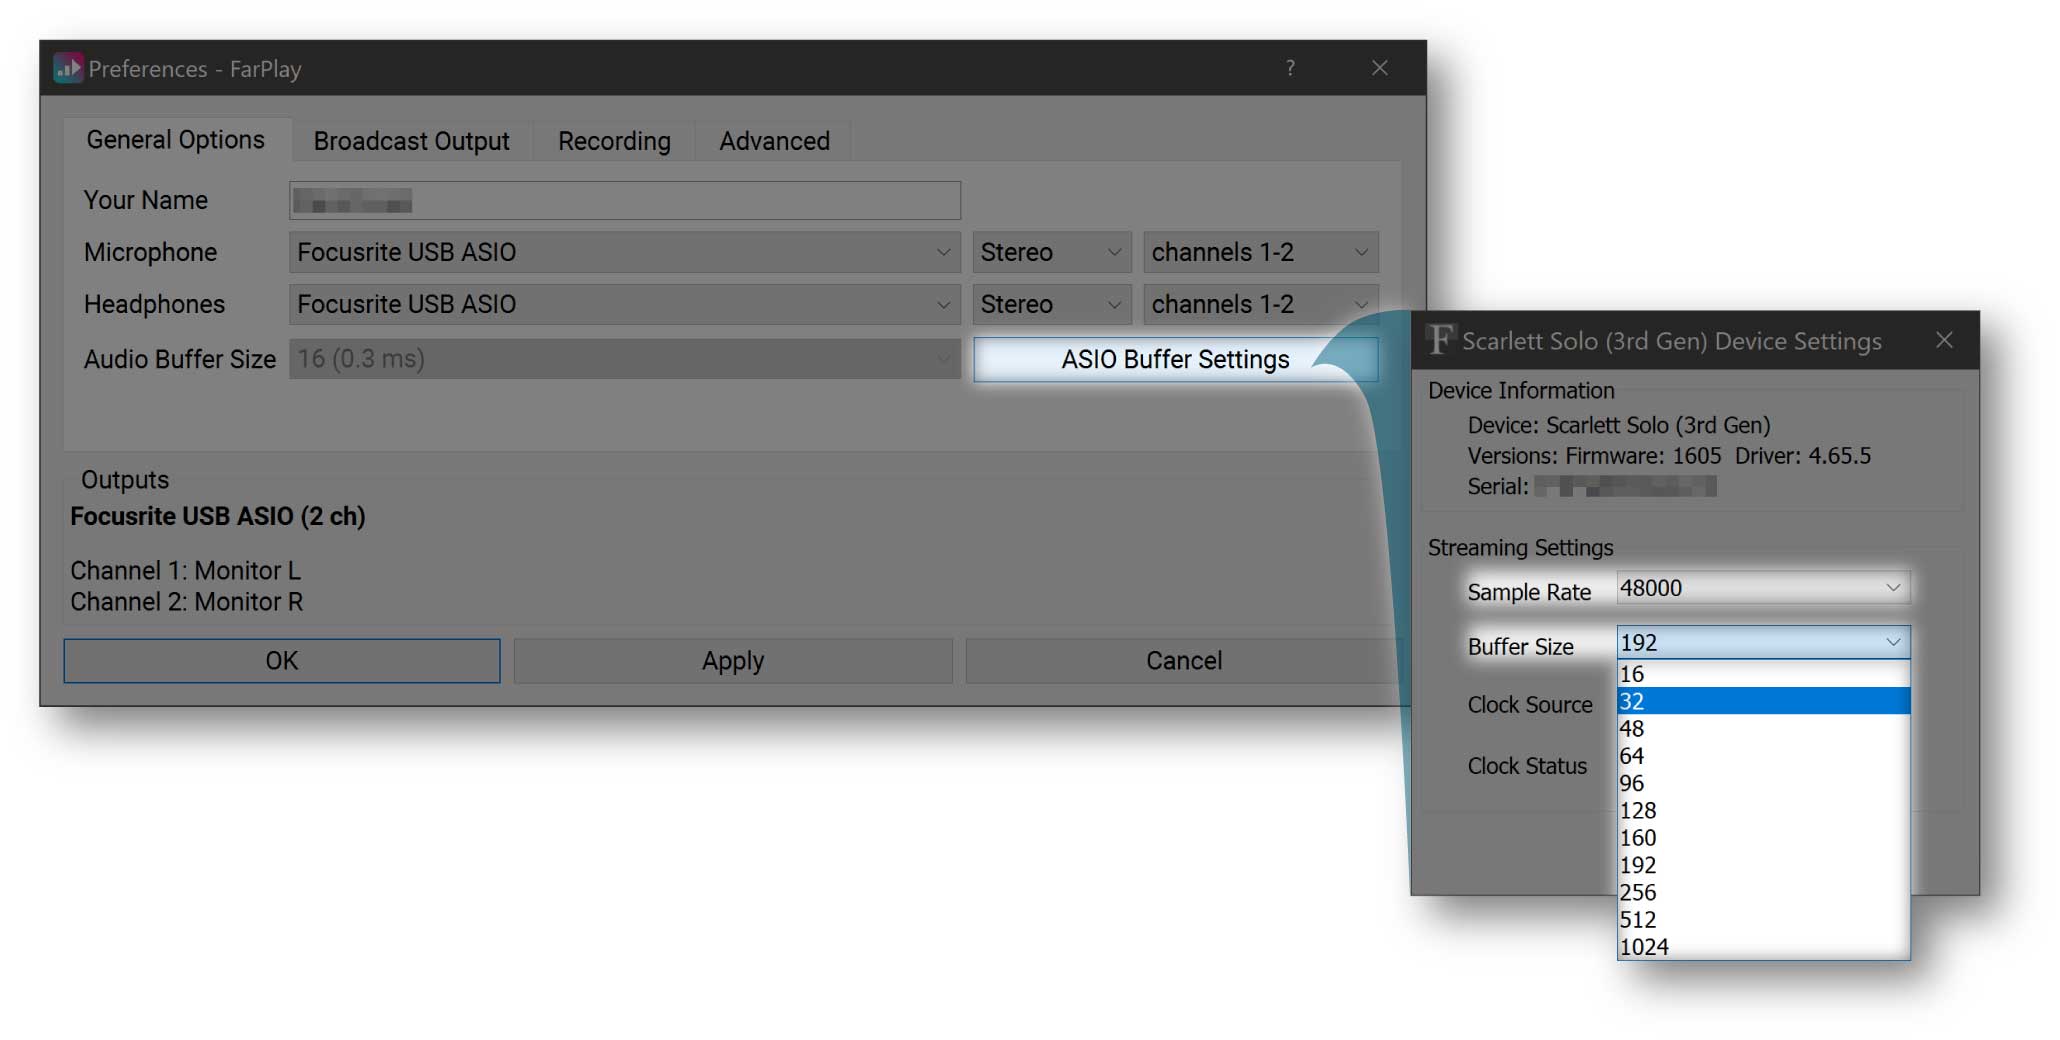
- If you wish, close the control panel you just used to select the ASIO Buffer Size.
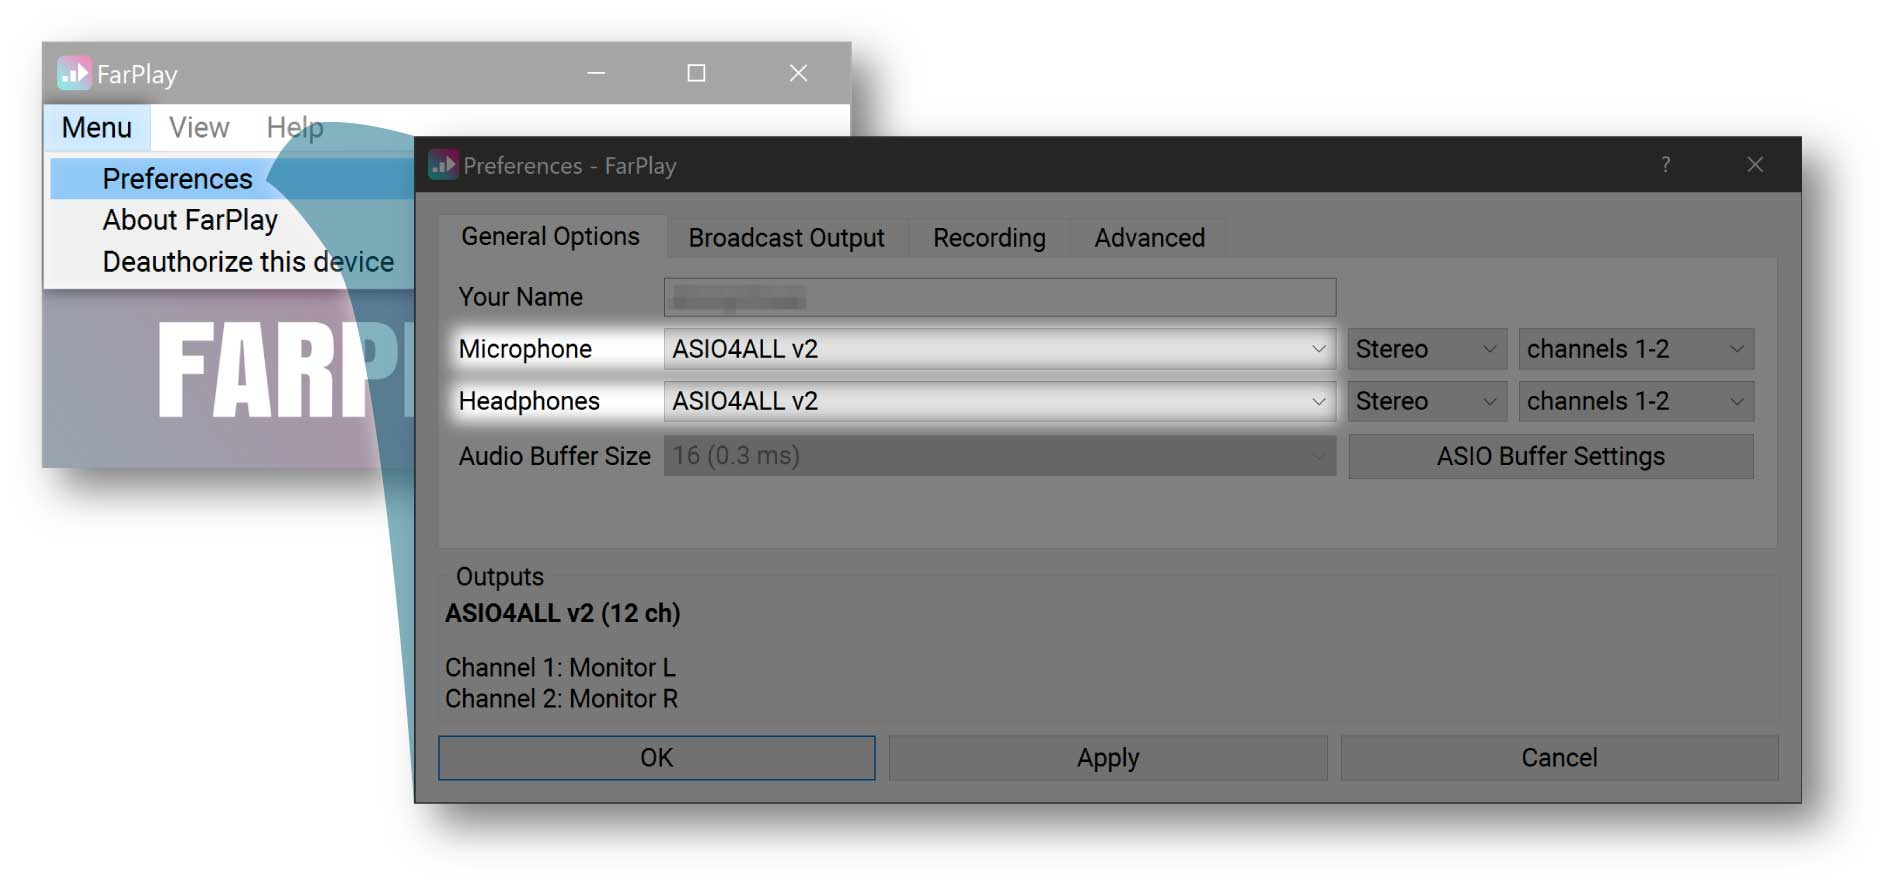
- In the FarPlay Preferences window, click OK.
- To verify that you are now set up to get low latency audio in FarPlay using ASIO drivers from your audio interface manufacturer, create a session that you alone join.
- Under Remote Sound, the estimated Local Latency should now be around a few ms (a value of 3 ms is not uncommon).
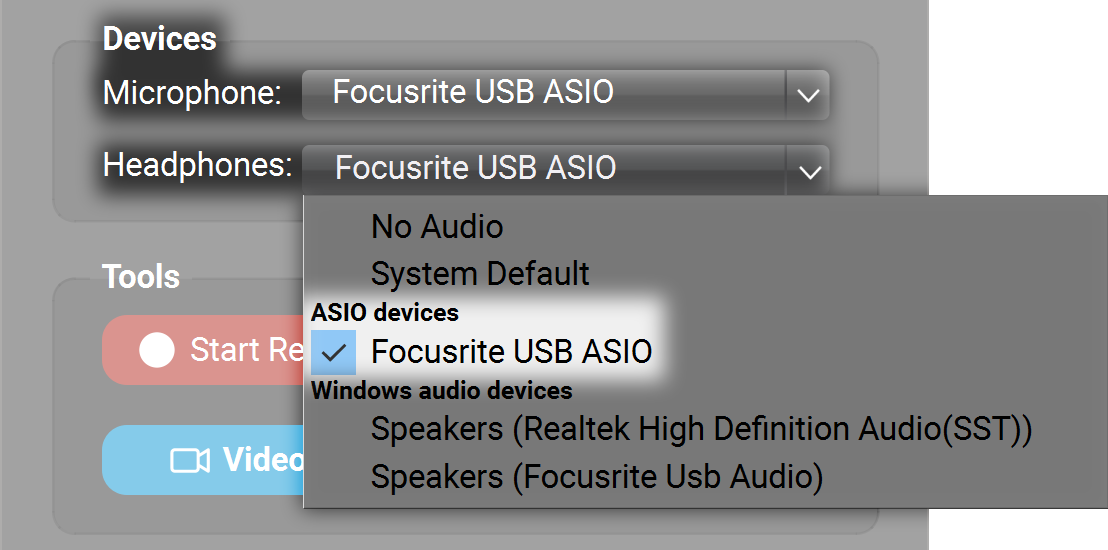
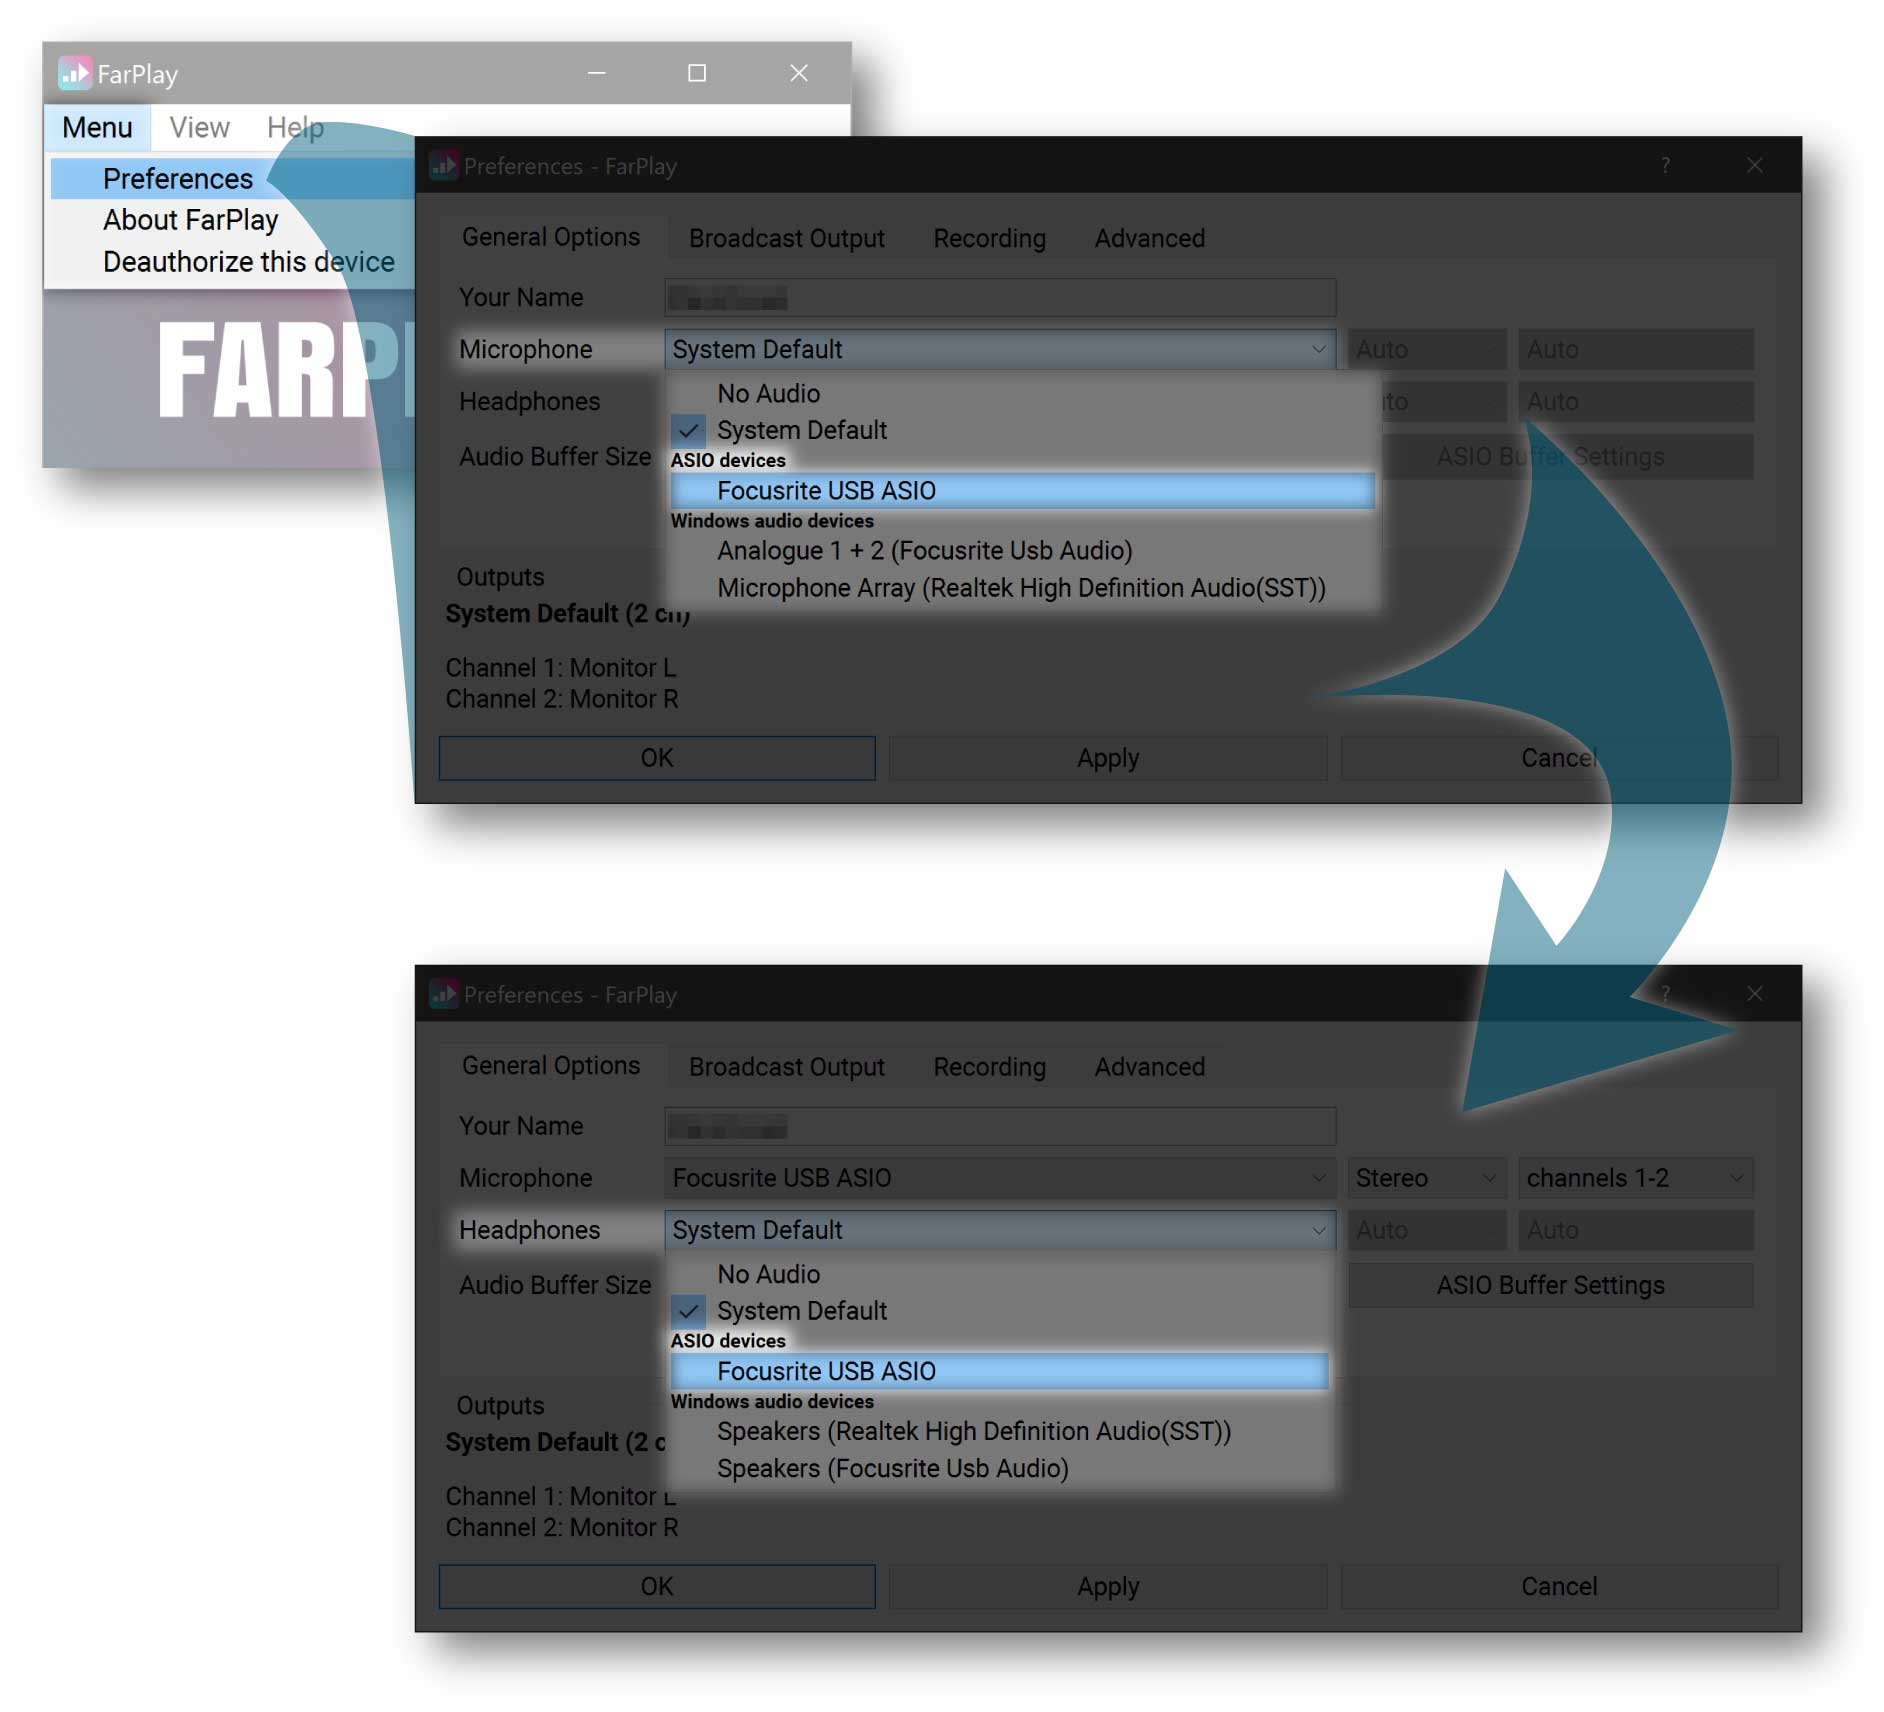
- Under Devices, both the Microphone: and Headphones: pull-down menus should be set to use your USB audio interface using manufacturer-provided ASIO drivers. To verify you’re using ASIO drivers, you can click on the Microphone: and Headphones: pull-down menus and verify that the checked device in each case is in the ASIO devices category, NOT the Windows audio devices category.