BRING AUDIO FROM ANOTHER APP INTO FARPLAY

Jump to:
  1. Bring audio in from a DAW
  2. Combine app audio and mic audio using a virtual sound card
  3. Run two copies of FarPlay at the same time
  4. Use your audio interface’s internal routing capability
  5. Use a mixer
⚠ Be careful to avoid routing FarPlay audio output through a virtual sound card (or cables or an audio interface’s loopback functionality) back into FarPlay, which will cause remote session participants to hear an annoying echo.

Bring audio in from a DAW

When using a Mac, the little bit of latency added by this method can be fine for many uses. A similar approach on Linux using JACK should provide superbly low latency as well. Getting low latency with this method on Windows is very difficult.
  1. Install a virtual sound card application. Popular examples include Rogue Amoeba Loopback (paid, Mac), Existential Audio Blackhole (free, Mac), and Voicemeeter (free, Windows).
  2. Create a pass-through virtual sound card device.
    1. If you use Rogue Amoeba Loopback, creating a new device creates a pass-through device.
    2. If you’ve installed Existential Audio Blackhole, there’s already a pass-through device called Blackhole available on your Mac.
    3. Likewise, if you’re on Windows and you’ve installed Voicemeeter, Voicemeeter’s virtual cable is already available and doesn’t need to be “turned on.”
  3. In your DAW, choose your usual audio input hardware (example: external mic or audio interface) as your audio input device.
  4. In your DAW, select the virtual sound card as the audio output device.
  5. In your DAW, use a low audio buffer size (try 16 samples if the option is listed—you can raise this value later bit by bit if you encounter some robotic/crackly distortion).
  6. Create mic, instrument, and audio file playback tracks in your DAW.
  7. In the FarPlay Preferences > General Options tab (or in the Devices section of FarPlay’s main window during an active session), set the Microphone to your virtual sound card.
  8. In FarPlay, try using an Audio Buffer Size of 16 samples (16 samples, 32 samples, and 64 samples are all reasonable sizes to try, at least on Mac, when trying to get low latency).
  9. Click OK to accept audio preferences in FarPlay.

Combine app audio and mic audio using a virtual sound card

This method is easy to use on a Mac. The latency achieved isn’t really great (not great for making rhythmically synchronous music over the internet).
  1. Install a virtual sound card application with mixing capabilities. Rogue Amoeba Loopback is a popular example for macOS.
  2. Use your virtual sound card application(s) to create a virtual sound card that brings in audio from a particular application (Chrome, for example) and your microphone.
  3. In the FarPlay Preferences > General Options tab (or under Devices in an active FarPlay session), click on the pull-down menu for Microphone devices and select the virtual sound card you created.
It’s convenient to do something similar on Linux, where JACK and Catia (or a similar JACK patchbay) take the role of the virtual sound card. JACK can be configured to provide really low latency audio.

Run two copies of FarPlay at the same time

This method is pretty easy to use on Mac and Windows. On Mac, the latency for both your mic audio and the audio brought in from another application is very good. On Windows, you should be able to get very good latency for your mic audio, but you might still get a bit of delay getting audio from the external application to FarPlay.
  1. Open and use your first copy of FarPlay normally (connected directly to your audio hardware). Confirm that monitor/gain levels are as desired.
  2. Create a pass-through virtual sound card device.
    1. If you use Rogue Amoeba Loopback, creating a new device creates a pass-through device.
    2. If you’ve installed Existential Audio Blackhole, there’s already a pass-through device called Blackhole available on your Mac.
    3. Likewise, if you’re on Windows and you’ve installed Voicemeeter, Voicemeeter’s virtual cable is already available and doesn’t need to be “turned on.”
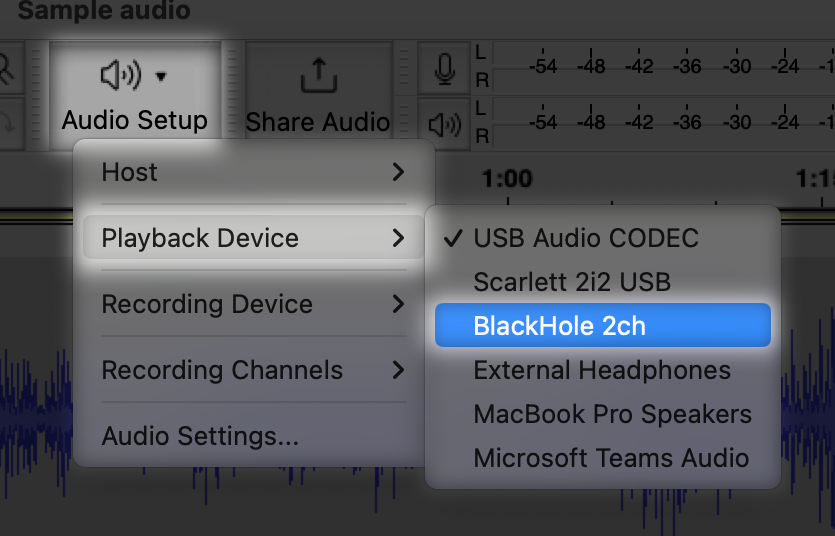
  3. Send audio from your external audio application to your pass-through virtual sound card.
    1. For example, in Audacity, click Audio Setup > Playback Device and select your virtual sound card.
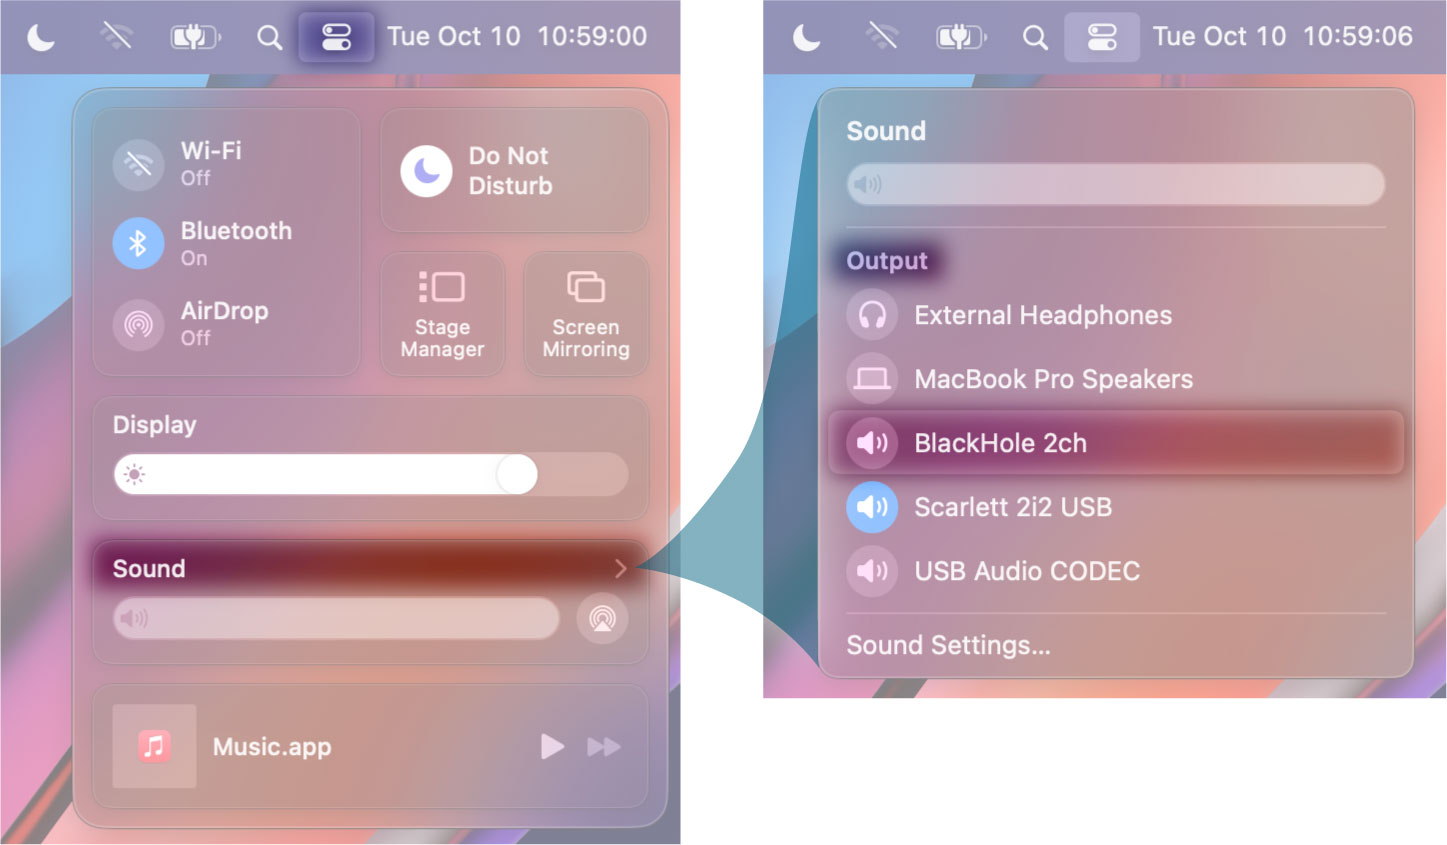
    2. You can send Mac system audio to a virtual sound card by clicking on the Control Center icon in your Mac’s menu bar, clicking the word Sound, and then, in the Output section, selecting your virtual sound card.
    3. You can send Windows system audio to Voicemeeter by opening the Windows Sound Control Panel, selecting the VoiceMeeter Input in the Playback tab, and clicking Set Default. Sending Windows system audio to a different virtual sound card is similar.
  1. Open a second copy of FarPlay.
    1. On Mac, you can install a second copy of FarPlay by clicking “Keep both” when trying to install a second copy of FarPlay into the Applications folder. Alternatively, you can run a second copy of FarPlay without dragging a copy of FarPlay to the Applications folder—download a disk image for FarPlay, open the disk image, and then double-click the FarPlay icon in the disk image folder.
    2. On Windows, find FarPlay in the taskbar. Right-click the FarPlay icon. In the context menu that appears, click FarPlay.
  2. Optionally, you can choose a different display name for your second copy of FarPlay to use (possibly less confusing than seeing two copies of the same name in a session later). To do so, go to the Preferences > General Options tab in your second copy of FarPlay and enter the desired name into the space labeled Your Name.
  3. In your second copy of FarPlay, use the Preferences > General Options tab or the Devices section of the main window during an active session to set the Headphones to No Audio and the Microphone to your Virtual Sound Card.
  4. Make sure both copies of FarPlay are connected to the same session.
  5. If having low latency is important for your use, try setting the audio output buffer in your external audio application and the audio buffer size in FarPlay as low as possible without causing robotic/crackly distortion. 16 samples, 32 samples, and 64 samples are reasonable values to try, and smaller is often better (very much so on Mac).

Use your audio interface’s internal routing capability

If you’re using an audio interface, you can check its manual/website to see whether it has built-in loopback functionality.

Use a mixer

  1. Connect an audio cable from your computer to a mixer.
  2. Plug your microphone into the mixer as well.
  3. Connect your mixer to your audio interface, which you select as the “Microphone” in FarPlay.
  4. In FarPlay, for “Headphones,” choose your audio interface. Do NOT choose the output the audio cable is plugged into on your computer as the Headphones in FarPlay.
  5. Send audio from your external audio application to the audio cable connecting your computer to your mixer.
    1. For example, in Audacity, click Audio Setup > Playback Device and select the output device corresponding to the appropriate output jack on your computer.
    2. You can send Mac system audio to an audio cable by clicking on the Control Center icon in your Mac’s menu bar, clicking the word Sound, and then, in the Output section, selecting the output corresponding to the output jack you’re using.
    3. You can send Windows system audio to an audio cable by opening the Windows Sound Control Panel, selecting the audio device your audio cable is connected to in the Playback tab, and clicking Set Default.