Send FarPlay’s Broadcast Output to your virtual sound card
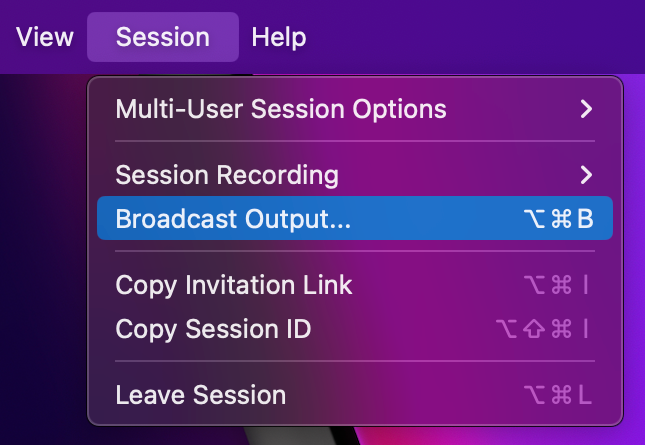
- From the Session menu, choose Broadcast Output.

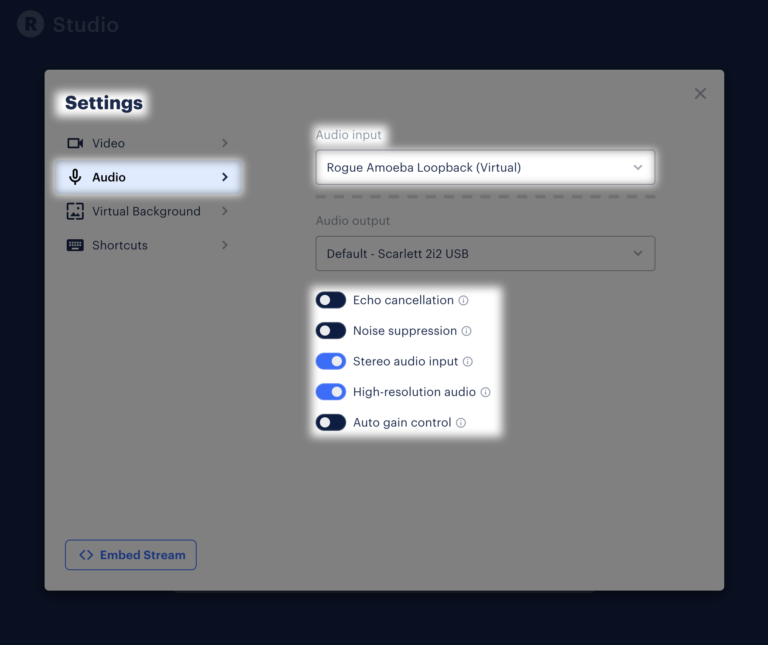
- In the Broadcast Output window that appears, use the Output Device pull-down menu to select your virtual sound card, and use the channels pull-down menu to select channels 1-2.
- Set Channel Layout to Stereo Mix (2 channels).
- Set the Delay in ms. If session participants are using less reliable network connections (unstable Wi-Fi connections, for example), a delay of 1000-2000 ms might be needed, but, in most cases with connections that are stable enough for real-time interaction, 500 ms (default)-1000 ms will be enough for pristine output.
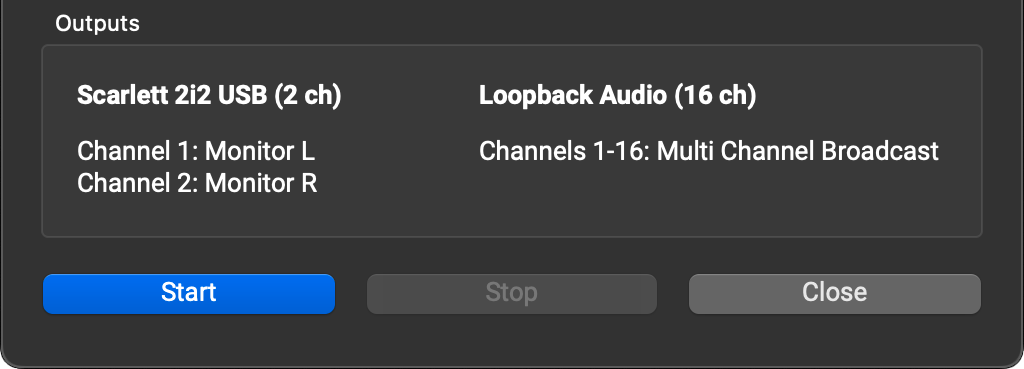
- The Outputs section shows you the devices and channels selected for headphone monitoring and Broadcast Output. The Outputs section will warn you if the channels selected for monitoring overlap with the channels selected for Broadcast Output. This creates an echo and is not recommended.
- Click the Start button to turn on Broadcast Output for the current session. A blue dot next to You (…) in the main window indicates that Broadcast Output is running.
- If you change a setting in the Broadcast Output window while Broadcast Output is running, click Apply. To exit the Broadcast Output window, click Close.
- To turn off Broadcast Output, click Stop. If you don’t click Stop, Broadcast Output automatically turns off when the session ends.


Send multichannel output to a DAW
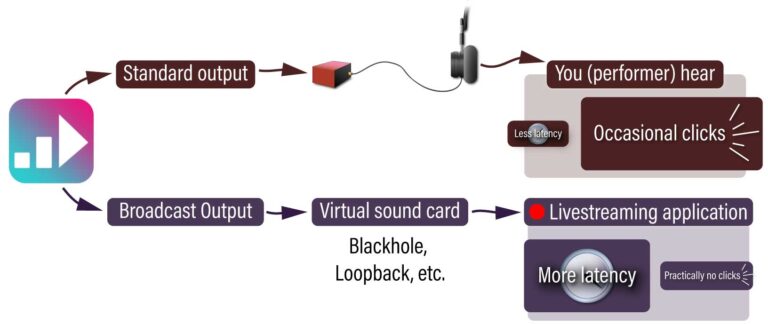
You can send FarPlay session audio via Broadcast Output to a virtual sound card and then onward to a DAW (examples: Logic Pro and Reaper). This is useful for recording in the DAW, where you can adjust levels and add effects, like reverb. You can also send a stereo mix out from your DAW to another virtual sound card and onward to a livestreaming application.
To send multichannel output to a DAW,
-
- From the Session menu, choose Broadcast Output.
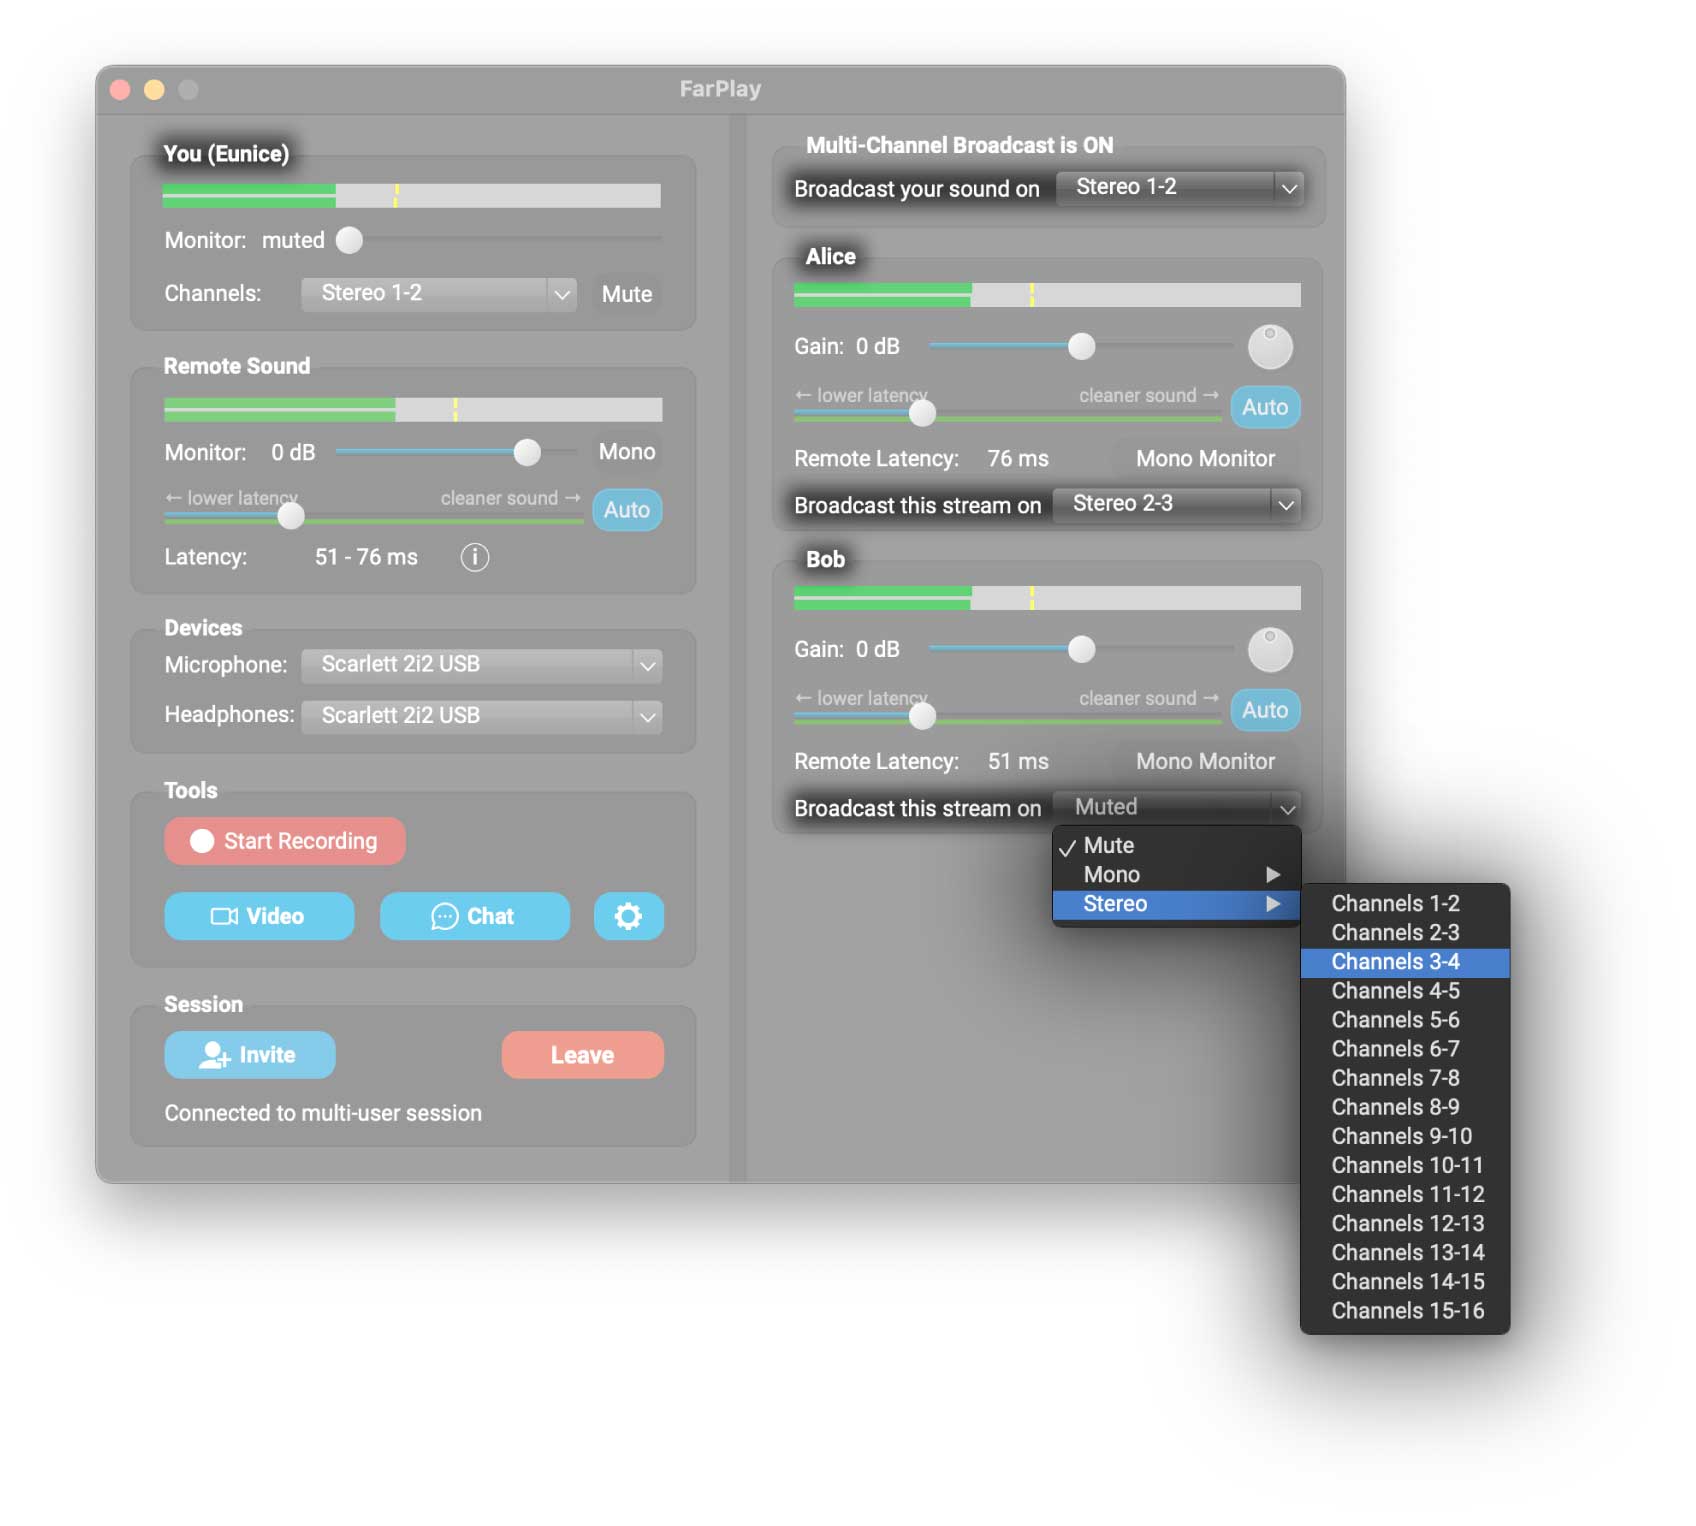
- In the Broadcast Output window that appears, select an Output Device with enough channels for the number of channels you want to output. Choose the range of channels you want to use (channels 1-16 in the example below).
- Change the Channel Layout from a simple Stereo Mix to Multichannel – Set Custom Channel per Connection (other choices are available, but this one is really intuitive to use).
- Set the Delay in ms. If session participants are using less reliable network connections (unstable Wi-Fi connections, for example), a delay of 1000-2000 ms might be needed, but, in most cases with connections that are stable enough for real-time interaction, 500 ms (default)-1000 ms will be enough for pristine output.
- The Outputs section shows you the devices and channels selected for headphone monitoring and Broadcast Output. The Outputs section will warn you if the channels selected for monitoring overlap with the channels selected for Broadcast Output. This creates an echo and is not recommended.
- Click the Start button to turn on Broadcast Output for the current session. A blue dot next to You (…) in the main window indicates that Broadcast Output is running.
- From the Session menu, choose Broadcast Output.