SETUP USING AUDIO INTERFACE


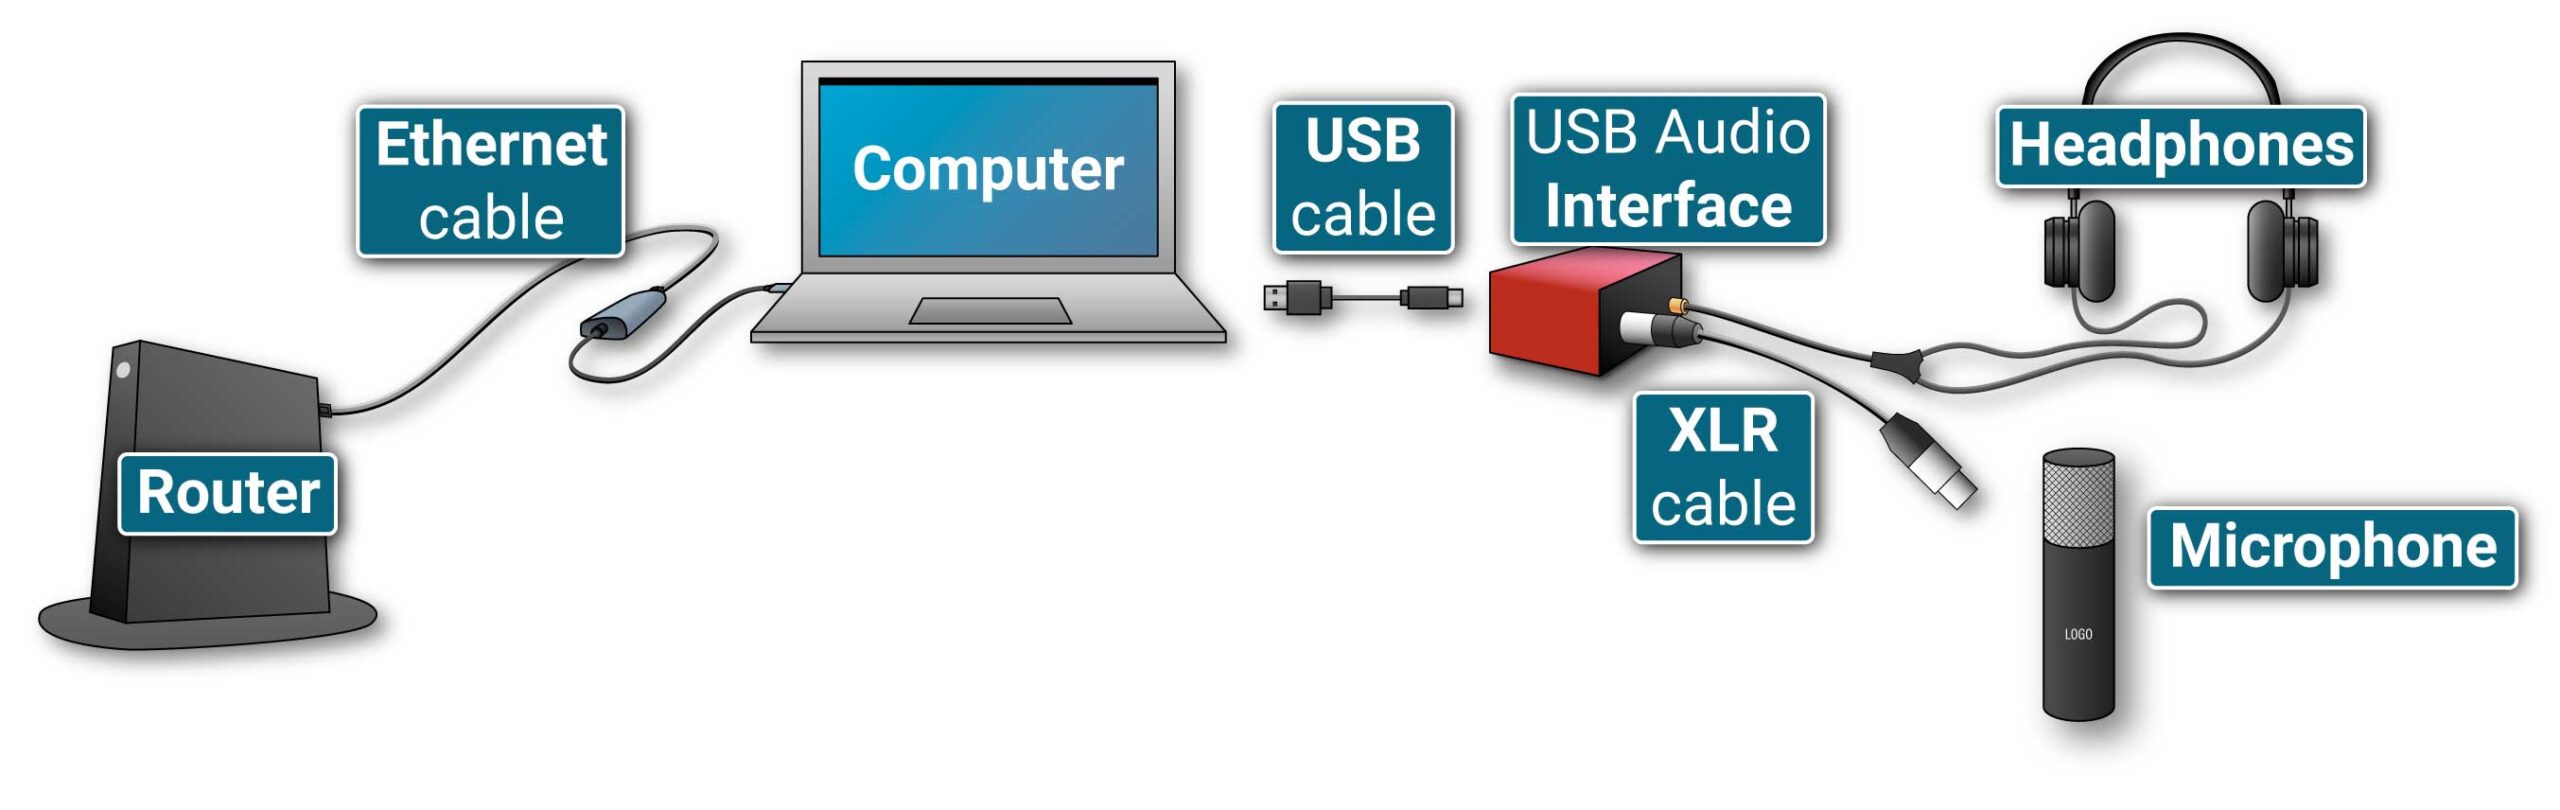
⚠ With equipment found in a typical home, it is often impossible to get the ultra-low latency needed for making music together in rhythmic sync unless you make sure your computer is connected directly to your router using Ethernet, with Wi-Fi turned OFF. (Wi-Fi can still work great for chatting, where latency isn’t nearly as critical).
- Make sure your computer is plugged in to power.
- Connect an Ethernet cable
 to a LAN port on your main router (don’t use a “satellite” router in a mesh system, extender, repeater, or Ethernet-over-Power adapter).
 - Connect the other end of the Ethernet cable into your computer (or into a USB-to-Ethernet adaptor that is plugged into your computer).
- On your computer, turn off Wi-Fi.
- ⚠ If you’re using Windows, make sure you have installed manufacturer-provided ASIO drivers for your USB audio interface on your computer according to manufacturer instructions.
- Make sure your USB audio interface is connected to its USB cable and that this USB cable is connected to your computer (or a USB hub connected to your computer).
- If you haven’t yet connected your microphone, make sure that on your USB audio interface, 48-V phantom power is OFF.
- Make sure your microphone is connected to an XLR cable that is connected to an input jack on your USB audio interface.
- If your microphone needs 48-V phantom power (examples: condenser microphone, dynamic microphone with in-line preamp like a “CloudLifter”), make sure on your USB audio interface that 48-V phantom power is on.
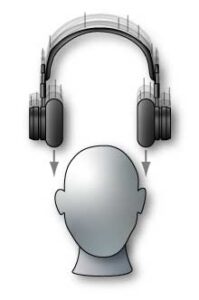
- Plug your headphones
 into the headphones jack on your USB audio interface. If your headphones plug is too small for your headphones jack, use a 1/4″-to-3.5 mm adapter (check whether this adapter came with your headphones).
 to a LAN port on your main router
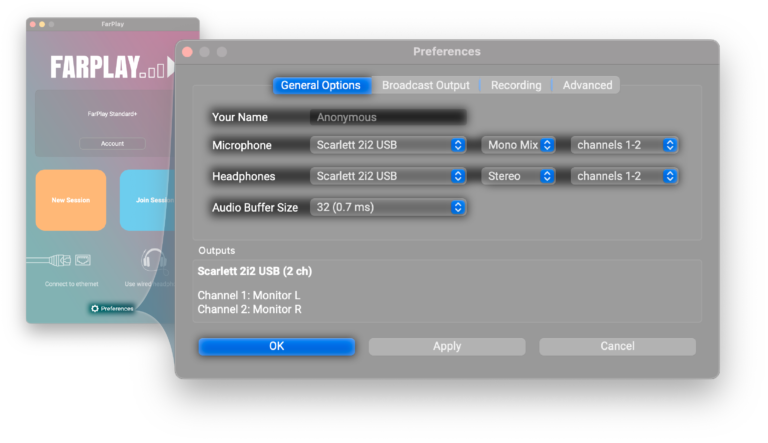

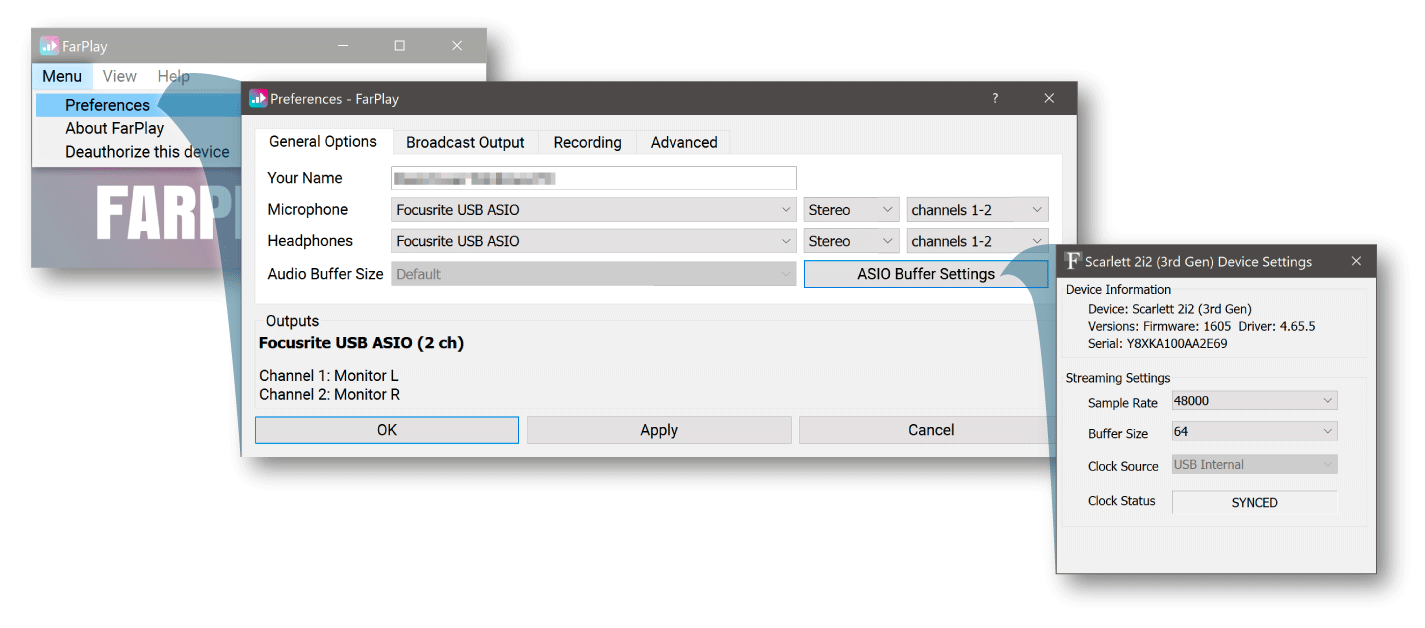

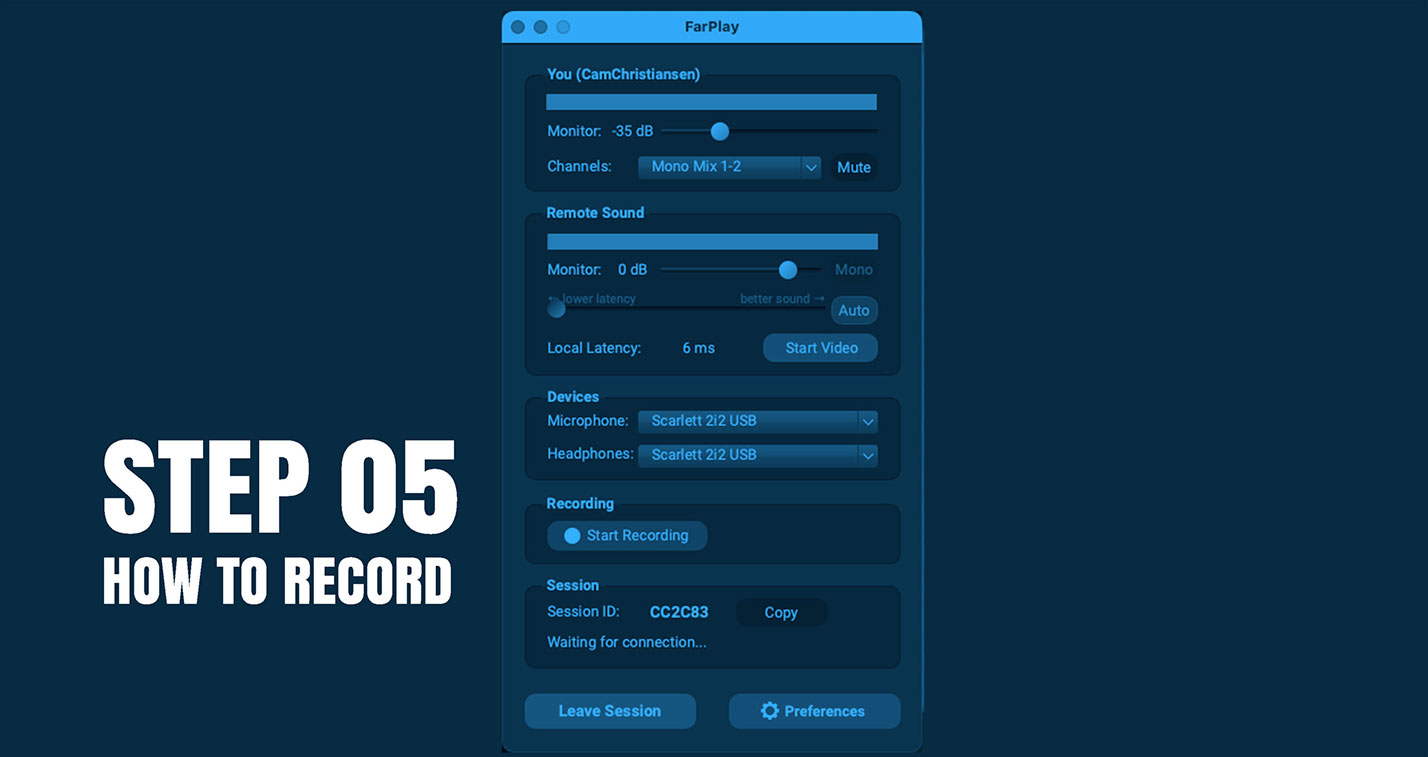
Set monitoring levels
- Under You (Your Name), you can adjust the Monitor slider (used previously to test your headphones) to adjust how loudly you hear your own voice through your headphones. Some people prefer to rely entirely on the acoustic sound they’re producing in the room to hear themselves; if that’s your case, you’ll want this muted (drag all the way to the left).
- The Channels pull-down menu can be used to verify/change the channels you are sending.
- Clicking the Mute button will silence the audio you transmit (useful for coughing or taking a phone call).
- Under the Remote User’s Name / Remote sound, you’ll see a second slider labeled Monitor. Here, you can set the level of the other participants in your headphones.
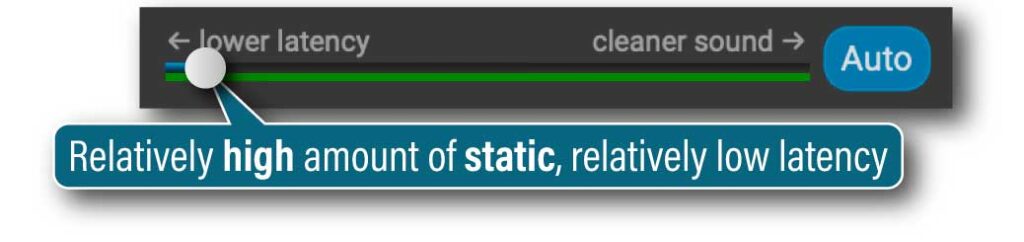
Set your latency
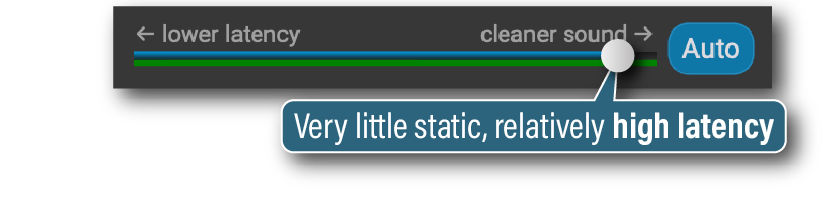
- Under the Remote User’s Name / Remote sound, look for a lower latency — cleaner sound slider. Drag this “latency slider” toward the right for fewer audio glitches (at the expense of higher latency). Drag the latency slider toward the left for lower latency (at the expense of more frequent audio glitches). In Auto latency mode (
 , on by default), FarPlay keeps adjusting your latency to try to maintain the level of audio quality you’ve chosen. In manual latency mode, FarPlay tries to maintain the level of latency you’ve chosen. The green bar indicates a range of slider positions corresponding to recommended compromises between latency and static.
 , on by default), FarPlay keeps adjusting your latency to try to maintain the level of audio quality you’ve chosen. In manual latency mode, FarPlay tries to maintain the level of latency you’ve chosen. The
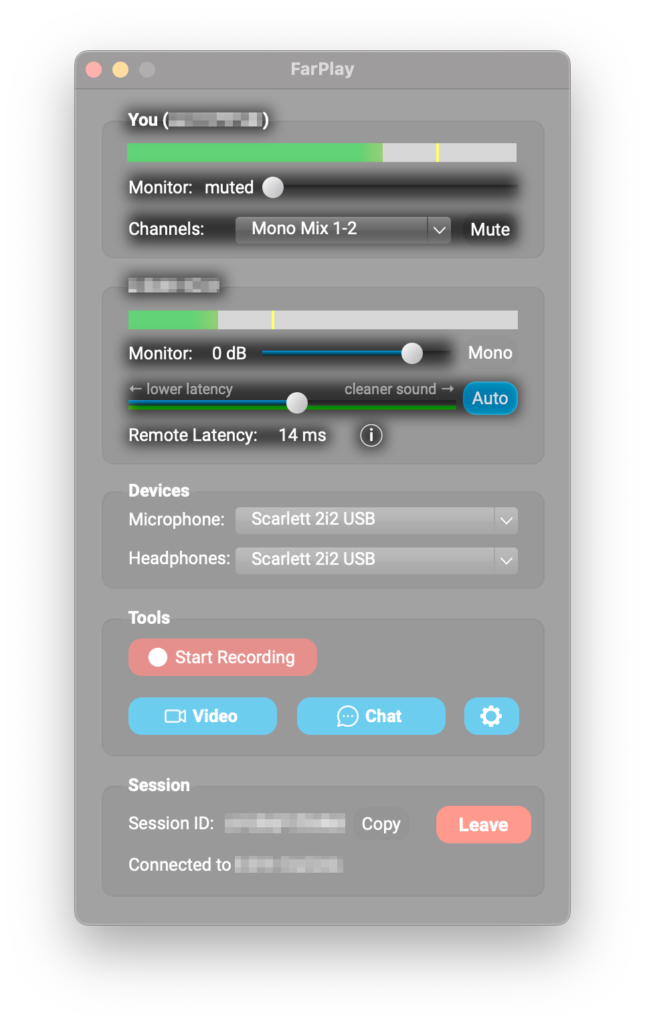

Start Video
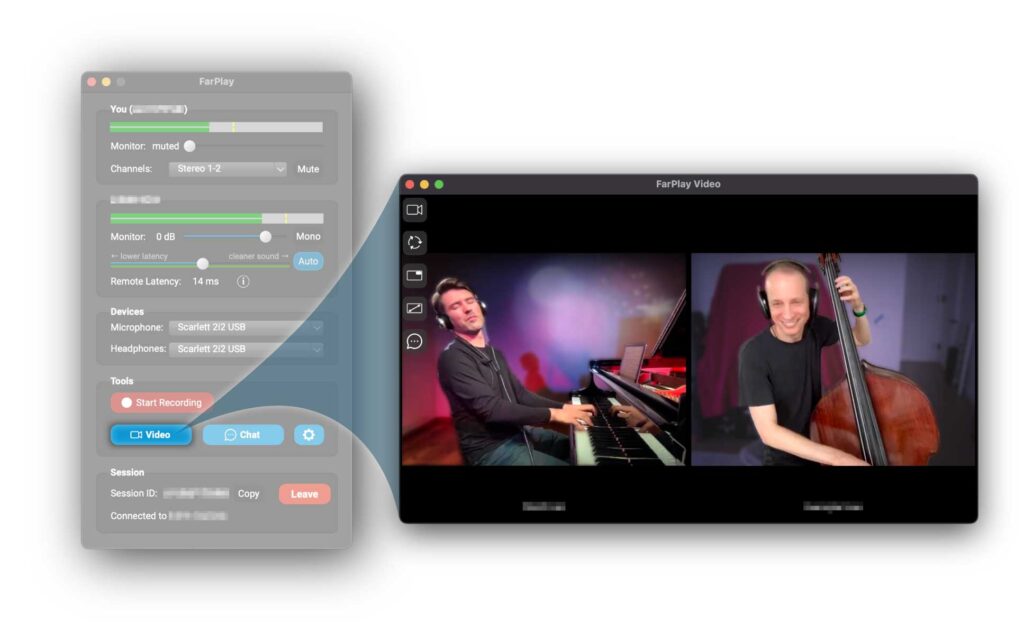
FarPlay includes built-in video.
- In the Tools section, click Video to open the video window. The Choose your camera button
 at the top-left corner of the video window lets you choose the camera you want to use share video. For more information, go to our detailed instructions for using FarPlay video.